This post picks up after part 1, part 2 and part 3. I suggest you read all 3 parts first to understand what is happening here in part 4.
In this part 4, we will setup the SCCM discovery methods, boundaries, boundary groups, SCCM roles, and push the SCCM Client to our client machine.
Lets get started
Discovery Methods
It is worth noting, that in a live production environment, proper planning is needed before a discovery method or combination of discovery methods, is selected.
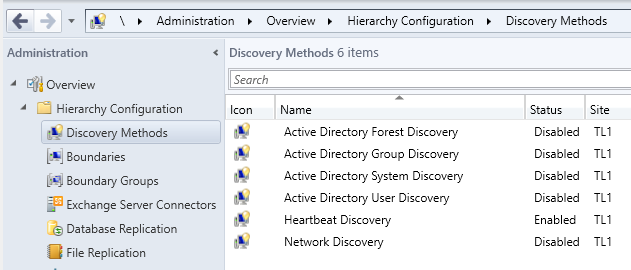
For our test lab environment, we want to discover users and systems. We can keep Forest, Group and Network discovery turned off. Heartbeat discovery is turn on by default.
Let configure the 2 discovery methods we need. First will be the System/Computer discovery
- Launch the SCCM Console (recommend you pin the console to the Taskbar)
- Click on Administration
- Expand Hierachy Configuration
- Select Discovery Methods
- Double click Active Directory System Discovery
- Check “Enable Active Directory System Discovery”
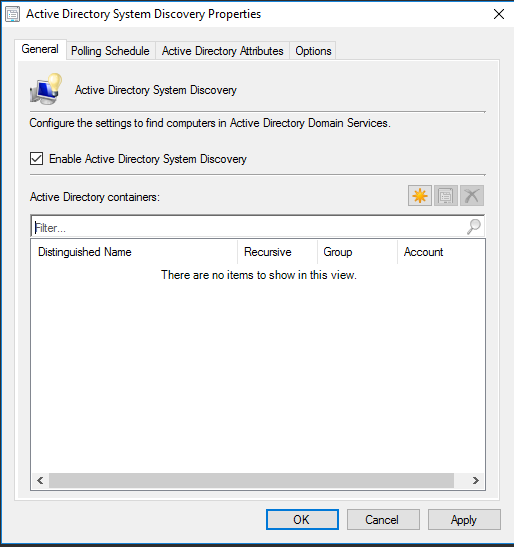
- Click New
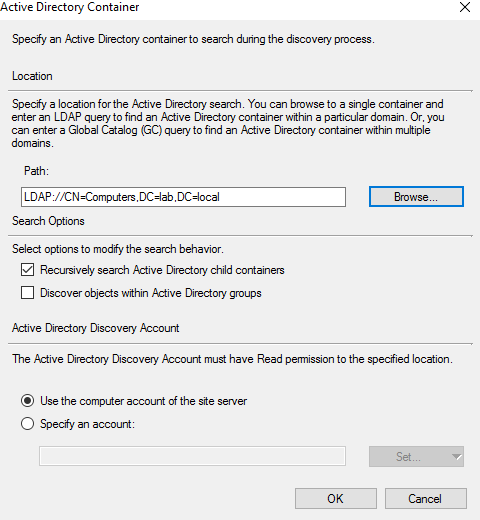
- Click Browse and select the Computers container.

- Click OK
- Click OK again
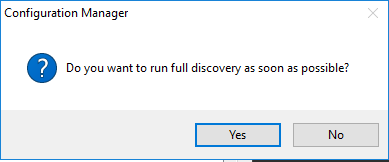
- Click Yes
We will then configure the user discovery. This is pretty much the same as System discovery above
- Double click Active Directory User Discovery
- Check “Enable Active Directory User Discovery”
- Click New
- Click Browse and select the Users container.
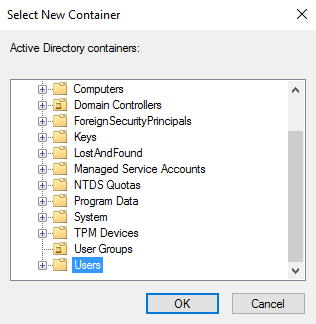
- Click OK
- Click OK again
- Click Yes
Boundaries
While the discovery runs, we need to also configure the boundaries and boundary group
- In Boundaries, Add a new Boundary.
- Choose IP Boundary, and enter the start and end IP address and enter a boundary name.
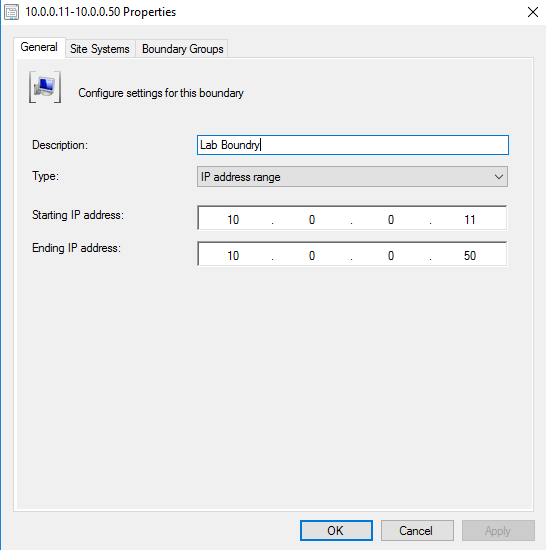
- Click OK
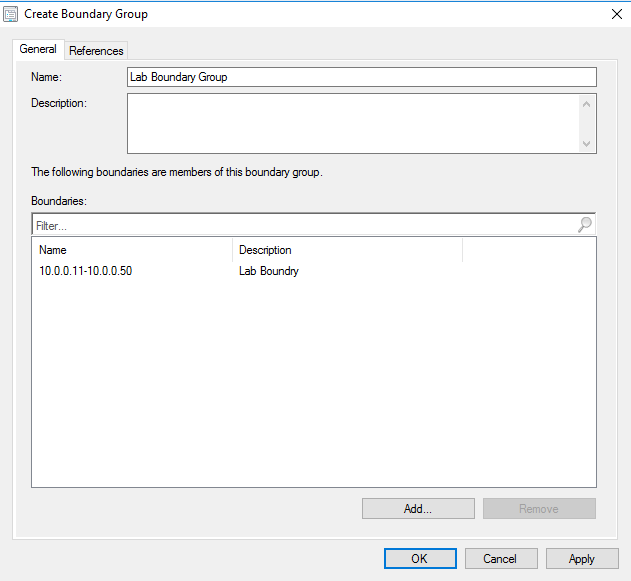
- In Boundary Groups, click Create Boundary Group
- Enter a boundary group name
- Click Add and select our earlier Boundary
- In the Reference tab, select “Use this boundary group for site assignment” and select our SCCM site
- Click Add and select our SCCM server.
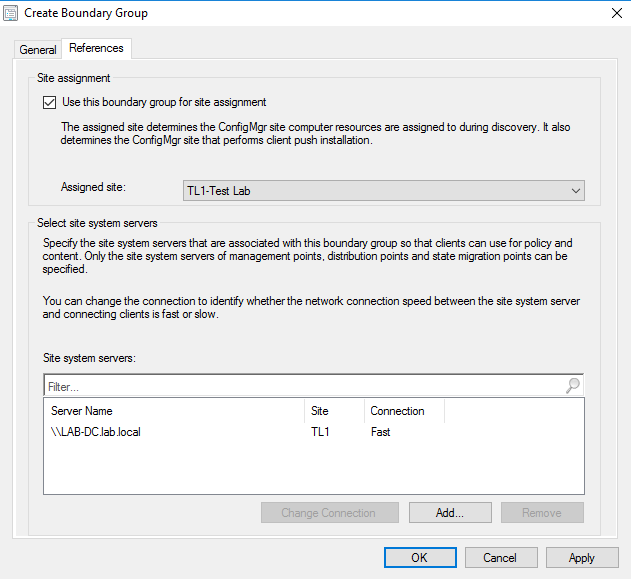
- Click OK
Before we proceed any further, we want to check if our discovery methods have worked.
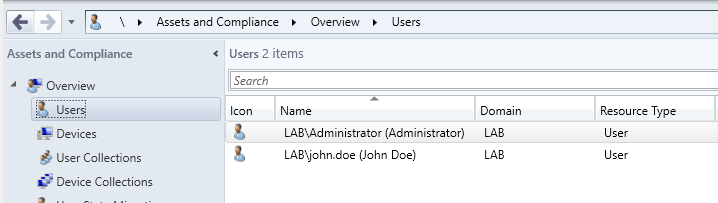
- In the console, select Assets and Compliance
- Select Users
- Check that our user is discovered
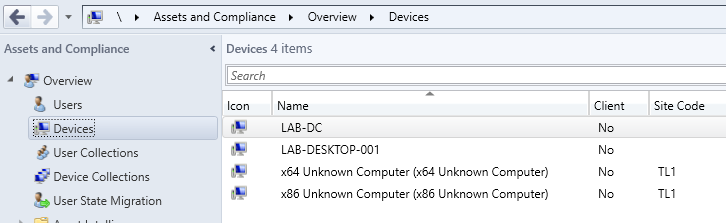
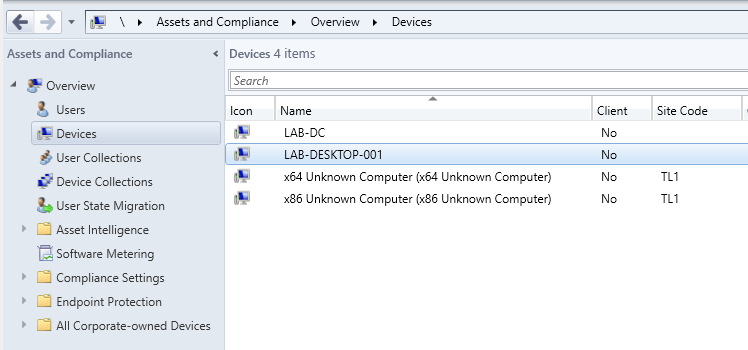
- Select Devices
- Check that our client machine is discovered.
Site Configuration
We also want to add a Application Catalog site role to our SCCM infrastructure. This allows users deployments to be visible to end users.
However, there is a problem with the SCCM source files. When installed on Windows Server 2016, that Application Catalog fails to install.
The SCCM install is looking for IIS version 7, which is version 10 on Windows Server 2016.
To fix the problem, we need to copy the MSI files out to our workstation.
- Go to the SCCM installation folder at G:\Apps\Microsoft Configuration Manager\bin\X64
- Copy to MSI files (awebsvc.msi and portlweb.msi) out to your workstation
- Get InstEd
- Open the MSI file in InstEd.
- Select the InstallExecuteSequence table
- Look for the action called “CcmCheckIISVersion”
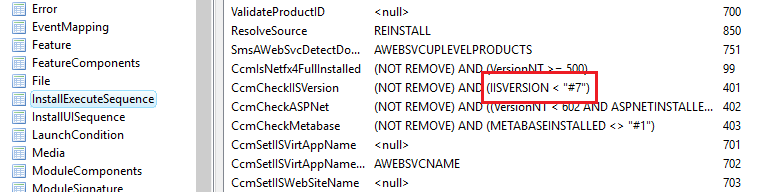
- This action has a condition to look for IISVERSION < 7
- We change this to < 10

- Select File > Save
- Copy both files back to the SCCM server into the SCCM directory G:\Apps\Microsoft Configuration Manager\bin\X64, replacing the existing files.
That should fix the source files, and we can now install the Application Catalog role on our server.
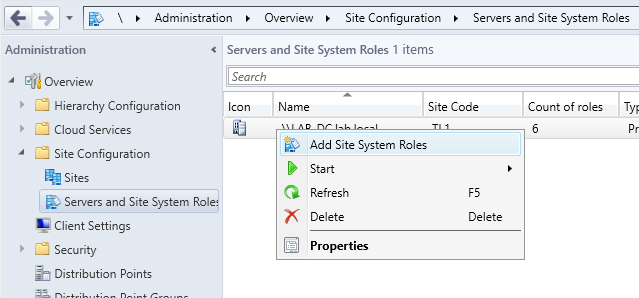
- Click on Administration
- Expand Servers and Site System Roles
- Right click on the primary server, and choose Add Site System Roles.
- Click Next twice
- Select the first 2 Application Catalog options.
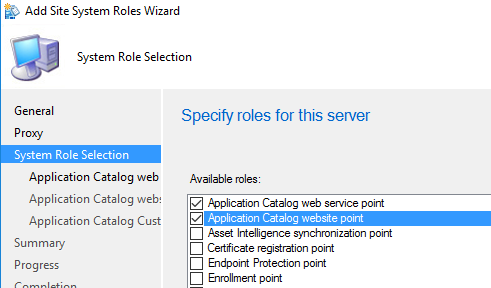
- Click Next through all the other option
- You will also need to fill in an Organization Name.
- Choose any name, it is more for cosmetics.
In previous releases of SCCM 2012, you could only install application assigned by user from the Application Catalog. Machine or device assigned applications installed from Software Center. But applications selected from the Application Catalog appeared in Software Center to install anyway. This caused much confusion for customers I have worked with before.
Thankfully, SCCM 1511 “fixes” that by offering a new Software center which combines both the Application Catalog and Software Center of before in a new Software Center view which combines both together.
To enable this new Software Center, edit the Default Client Settings properties.
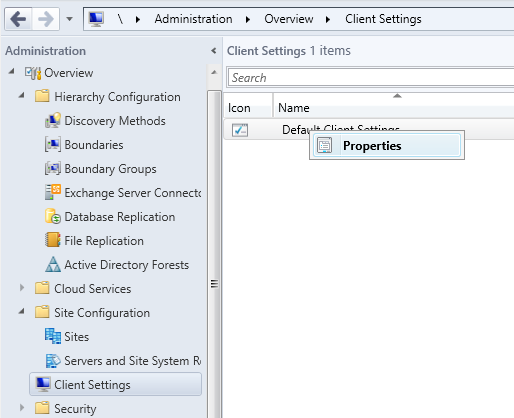
Select Computer Agent from the left frame, and change the “Use new Software Center” to Yes.
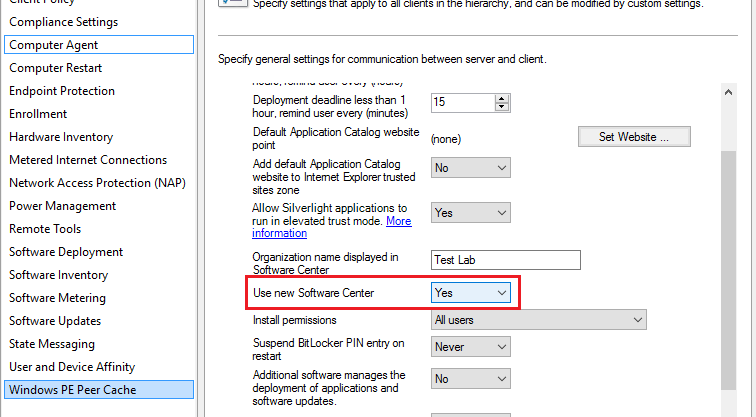
Before you click OK, there is something else we want to change.
The default client settings also includes items the client agent will collect information (called inventory data) from the client machines and send it back to our SCCM server. This settings however, excludes App-V version 5 details. We want to enable App-V inventory data now.
- Select Hardware Inventory
- Click Set Classes
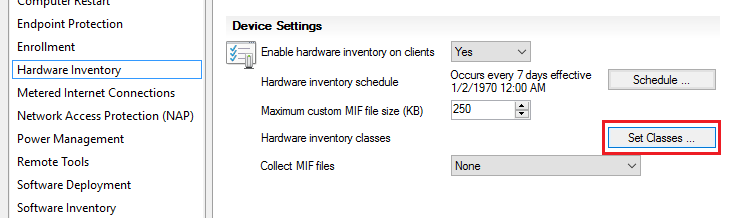
- Wait for the list to load.
- Select the first 2 App-V classes: AppV Client Application and AppV Client Package.
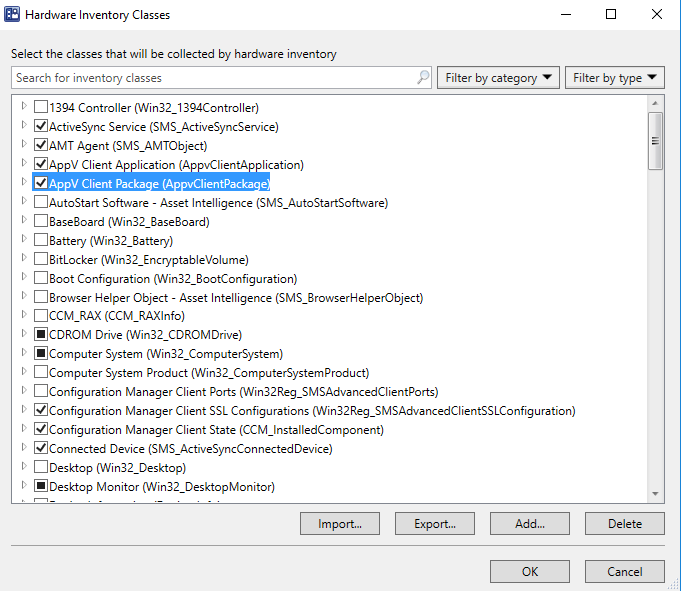
- Click OK
- Click OK again to close Default Client Settings.
We are almost done now. We just have 1 final thing to do, which is to create a new application deployment. I’ll be using 7-Zip from 7-Zip.org
Application Deployments
We need to first create a share of the file location. This optional, since in our lab, we will be doing this locally from the server. But if you ever need to deploy application remotely (SCCM console running on another machine or server), it is best to have a file share.
We will create a new file share of or repository folder G:\REPO\Software called \\lab-dc\repo$.
As this is an optional steps, i wont be showing how to create the share.But if you wanted, you could do it from the command line using:
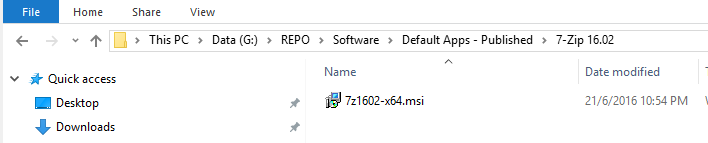
net share repo$="G:\REPO\Software" /grant:Users,READWe want to copy our application installer to our repository location.
G:\REPO\Software\Default Apps – Published\7-Zip 16.02
- In the SCCM console, select Software Library
- Expand Application Management.
- Right click Application, select Folder > Create Folder
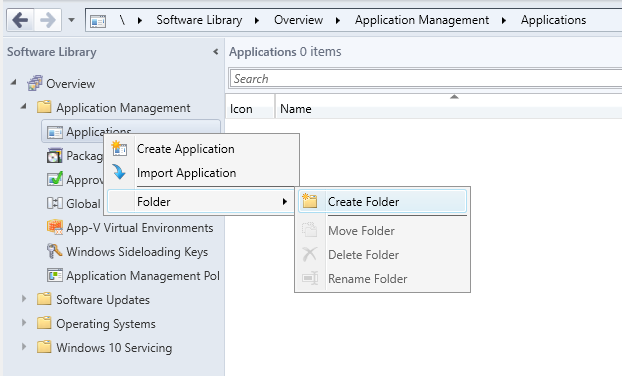
- Create a new folder for application available for everyone.
- I’ll be using a folder called “Default Apps – Published”, same as the folder name on the repository location
- Click OK
- In the new folder, click Create Application from the toolbar (or ribbon as it is correctly known).
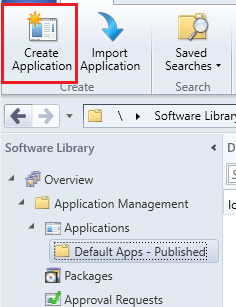
- Select Type: Windows Installer
- Location: Path to 7-Zip installer MSI (\\lab-dc\repo$\Default Apps – Published\7-Zip 16.02\7z1602-x64.msi)
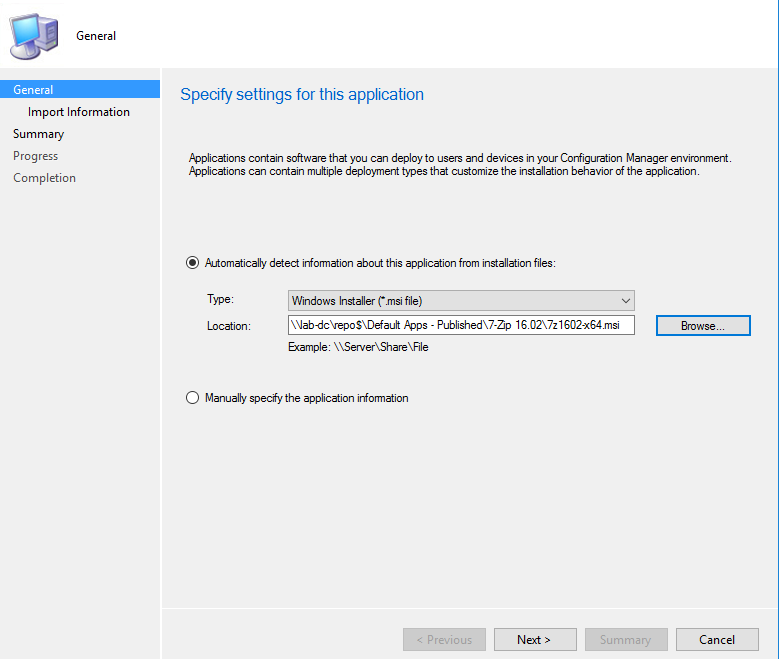
- Click Next
- You may get a “publisher cannot be verified” message, which is fine for our lab. Click OK if appears.
- Click Next
- Change the installation settings as necessary
- We change:
- Shorten name to 7-Zip 16.02
- Added Supplier: 7-Zip
- Added Version: 16.02
- Change install command line, removing /q, replacing with: ALLUSERS=1 /qb!
- Change Install Behaviour: Install for system
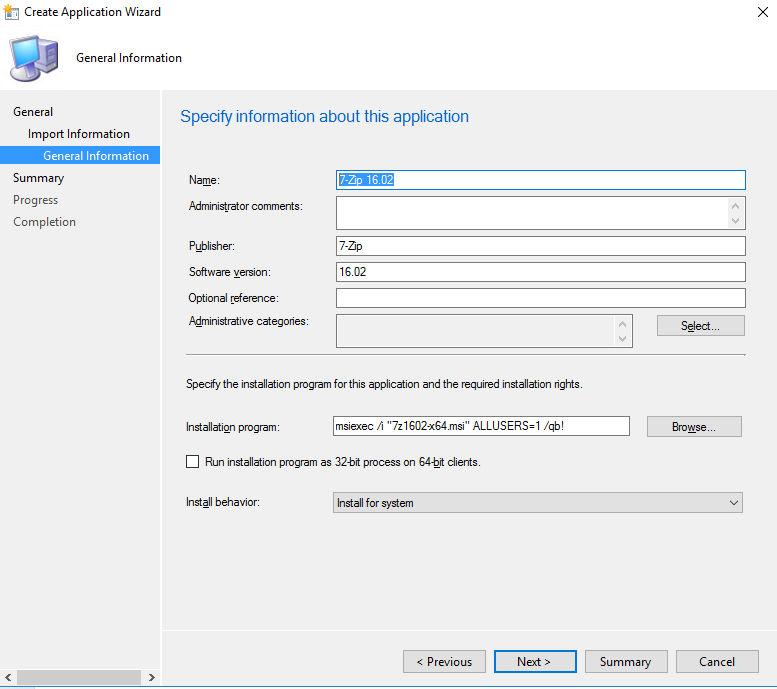
- Click Next
- Click Next in the Summary screen, let the publishing complete.
- Click Close once done.
We will want to edit the application, to add some other useful details.
Select the application in the console, and click Properties from the toolbar/ribbon (or right click and select Properties).
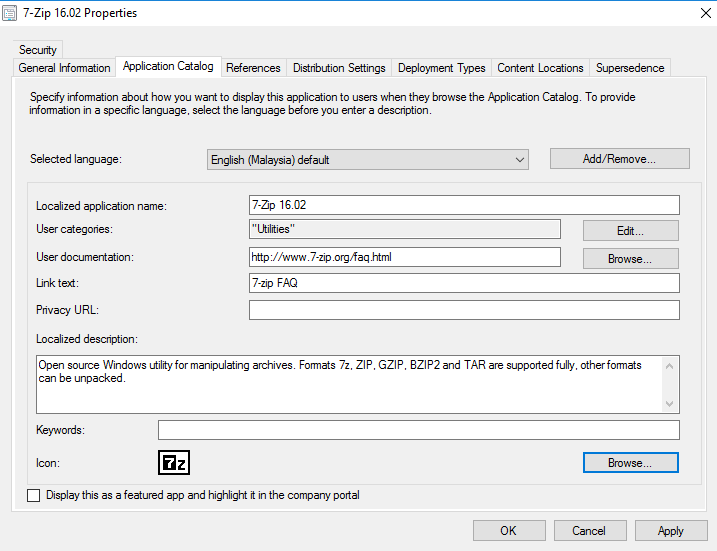
In the Application Catalog tab, edit the settings as required.
Here, I’ve added a few items.
- User Categories, i added “Utilities” category. You can add more by clicking Edit
- User documentation
- Link text. This will appear in Software Center. Clicking this will take you to the user documentation.
- Localized description
- Icon. This turned our a little more tricky to get. I ended up having to get 7zG.exe from another machine, and use this file on the server to select the icon.
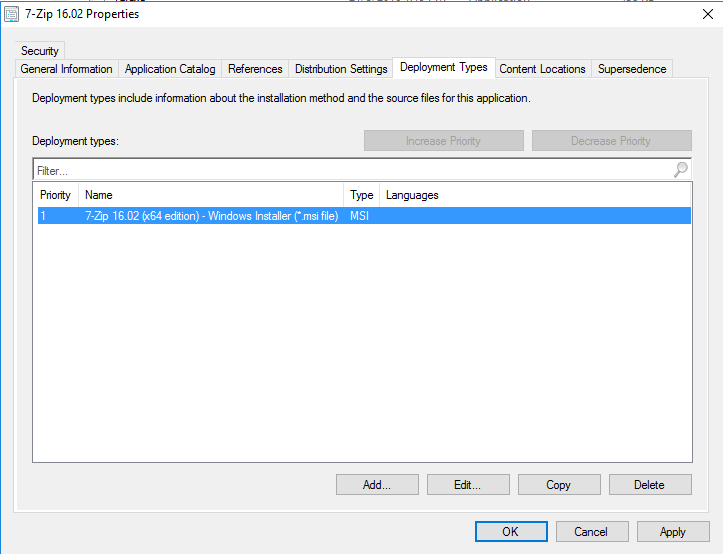
In the Deployment Types tab, click Edit.
In the User Experience tab change
- Logon Requirement: Only when a user is logged on
- Install program visibility: Normal
- Tick Allow users to view and interact with this program installation.
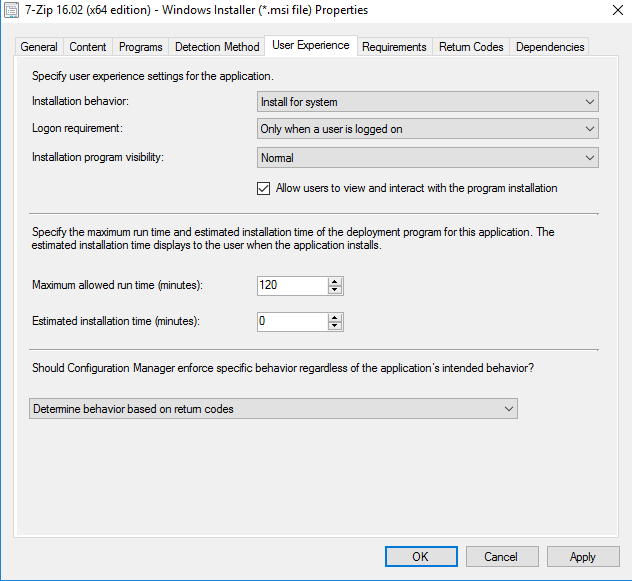
Click OK to close Deployment Types properties
Click OK to close Application properties
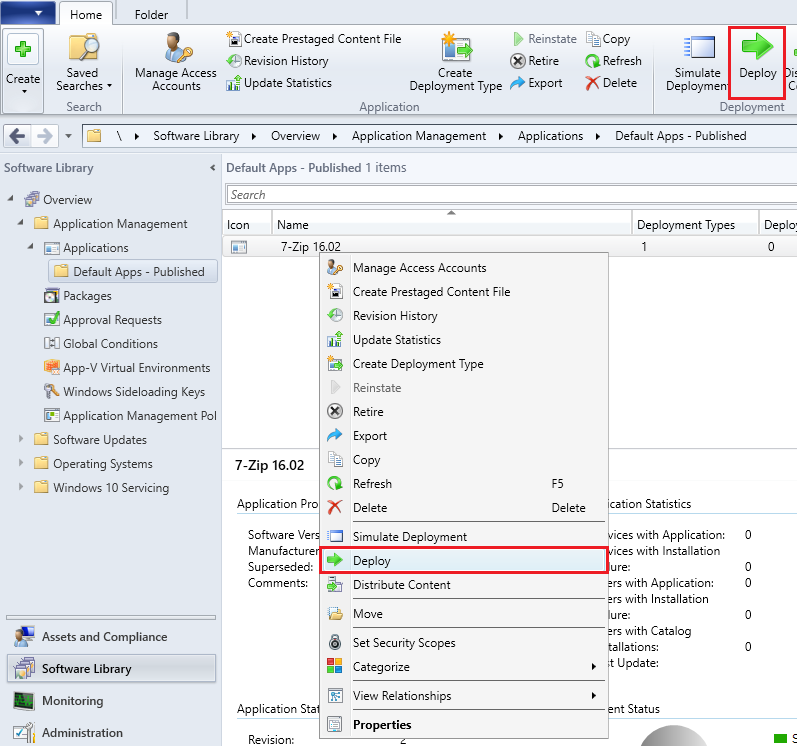
We now need to deploy our application.
- Select the application and choose Deploy from the toolbar/ribbon (or right click and choose Deploy)
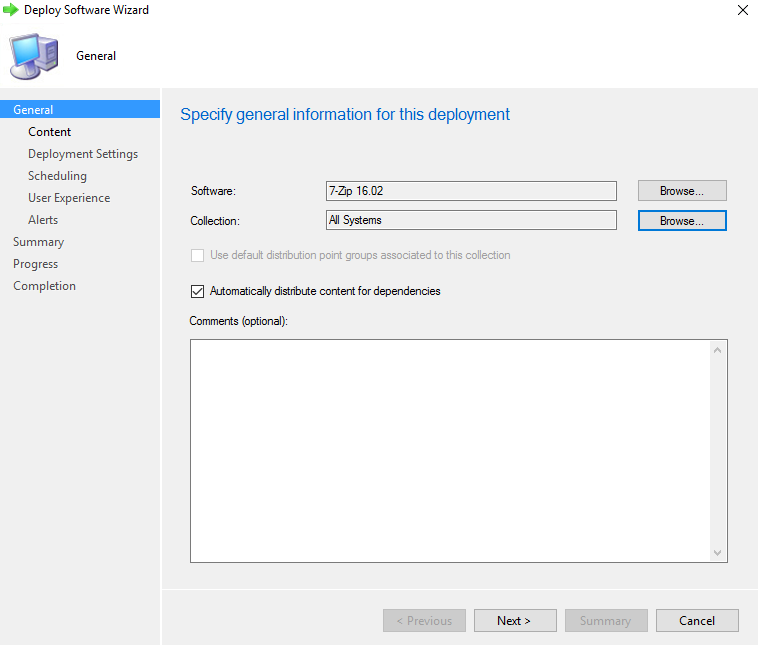
- Select All Systems collection. Click Next
- For the content, choose Add and add the LAB-DC distribution point
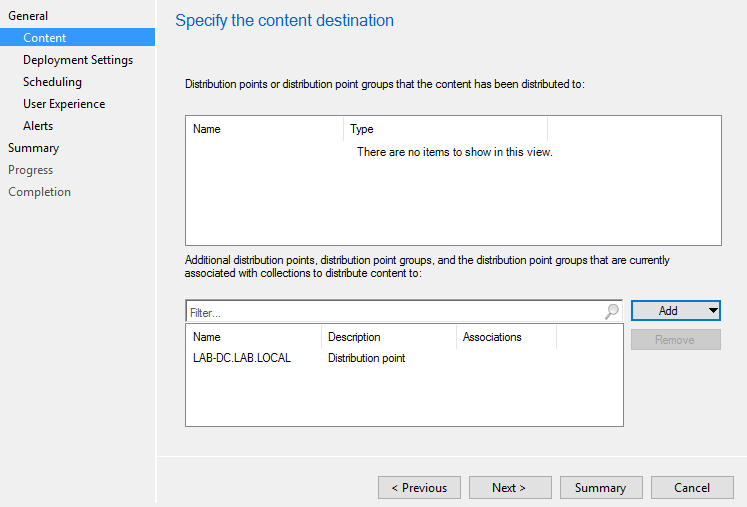
- You can click next through all the other prompt until the end.
You should now have new deployment in the Deployments tab.
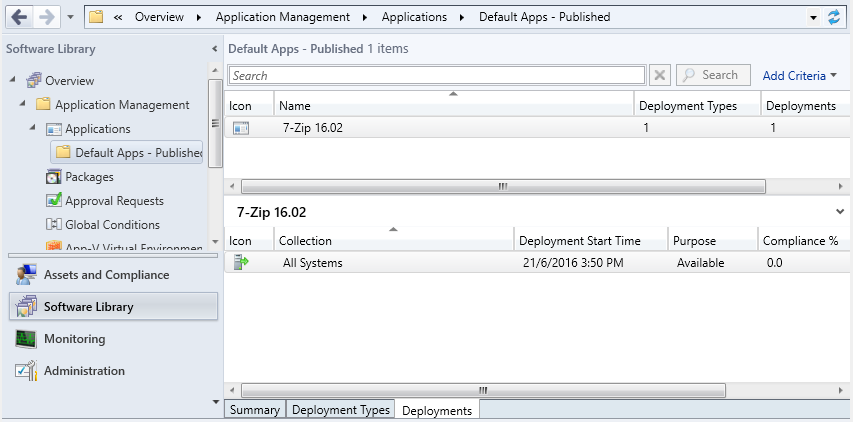
Just give it a few minutes to run, and the Deployment should be complete.
Push Client Installation
Right now, we have all we need to get our client machine configured. Start up the client machine and wait for it to reach the logon screen.
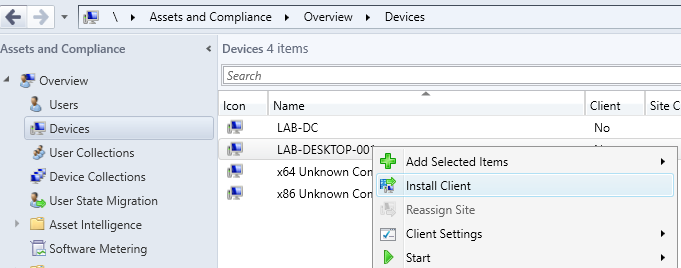
- Back on the server, in the SCCM console, go to the Assets and Compliance, and click on Devices.
- Right click on our client machine, and choose Install Client.
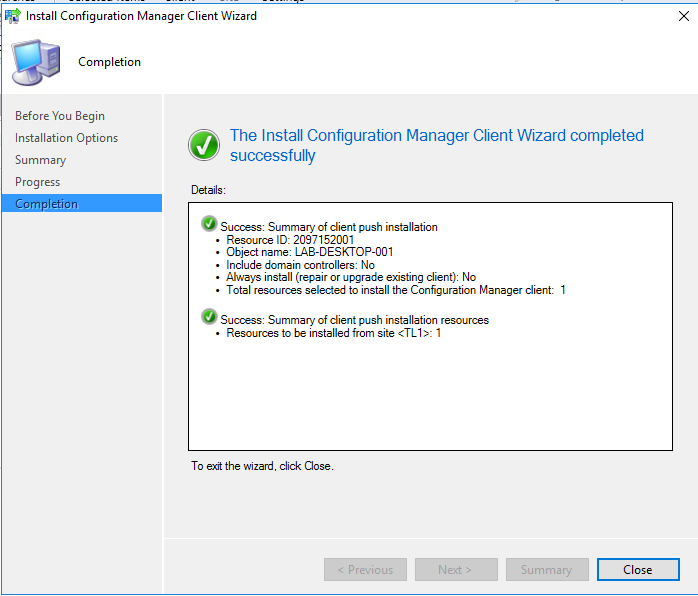
- Click next through all the steps.
- At the final screen, click Close.
It will take several minutes for the SCCM client to install on the client machine. But in our current situation, the push installation will fail. If we check our SCCM log on the server (G:\Apps\Microsoft Configuration Manager\Logs\ccm.log), we see the following error:
ERROR: Failed to connect to the \\LAB-Desktop-001.lab.local\admin$ share using account 'Machine Account'But wait, all is not lost! This error was intentional, to simulate some troubleshooting steps 🙂
The error message basically means, our server account does not have rights to connect to the client machine. Our server account (machine) is not an administrator on the client machine. So we need to change the Client push installation account.
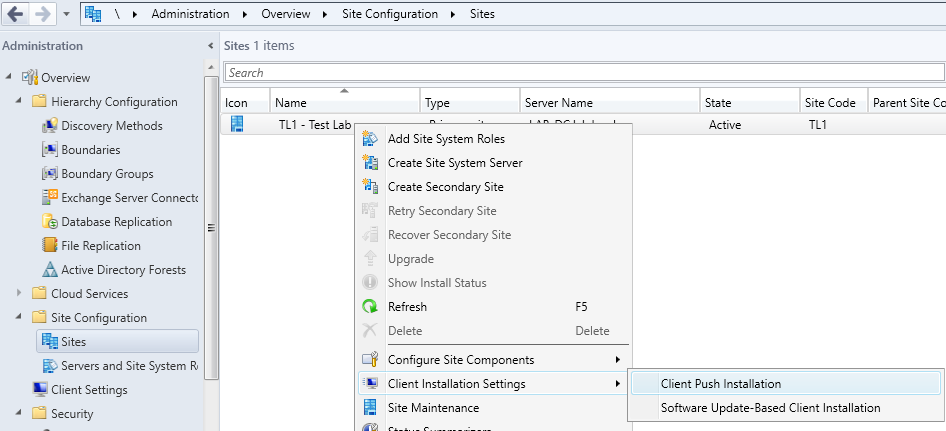
- In the SCCM Console, select Administration > Site Configuration > Sites
- Right click on the site and select Client Installation Settings > Client Push Installation
- In the Accounts table, click New and select New account
- Select Administrator account and click OK
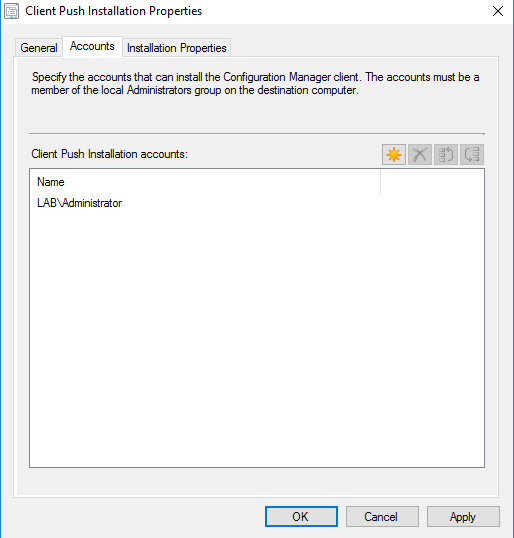
Click OK again.
If you tried the push the client installation again, it would still fail. We need to add another firewall rule. We need to add a new predefine rule to allow WMI connections through. Refer to part 3 for the steps, and add a WMI filter rule.
Once done, restart the client machine.
Retry to push the SCCM client again. It should work this time.
Give it a few minutes. Once the client installation is done, the status will be reflected back in the SCCM console on the server.
That is all for part 4. In part 5, we will look at some of the settings on the client, test out our application install (7-Zip), and also deploy more applications. Part 5 should be the last part of the series in setting up your own SCCM test lab environment.
Refer to other parts
Where is part 5?
Sorry for the delay. Part 5 has just been published here
Is there anything different about the new WMI filter rule from the previous one created in step 3 of this tutorial? I am at a loss as to how to create it and add the firewall rule necessary.
Hello. I followed your guide and was able to push 7zip to the client. However when I deploy the Windows Updates to our Windows 10 Client machines, the deployment is successful, but the updates do not push. Any help with this would be appreciated. Thank you.
Thanks soooooooooooooooooooooooo much for the awesome SCCM tutorials, they are so very clear, easy to understand…..Much Apprecaited!!! Thanks.