
This is article is part of a 5 part series. Refer to the other parts here
From part 1, we got all the tools we needed and are now ready to start installing MDT and getting started on our first reference image.
Install MDT
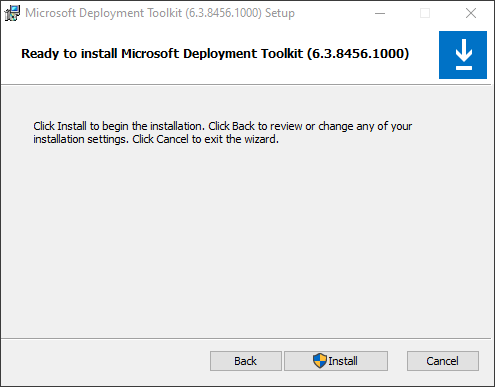
Installing MDT is pretty straightforward. Just double click the installer and go through the steps till the end.
Once done, you can launch Deployment Workbench. But if you click Deployment Shares, you get an error.
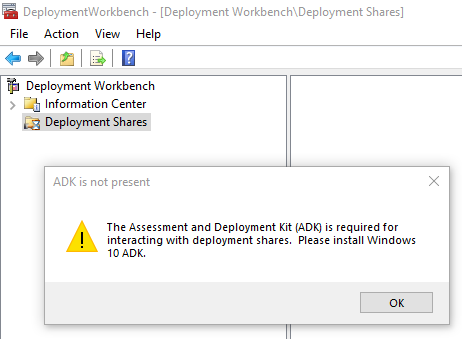
So we will install ADK next. We can go through with most of the defaults.
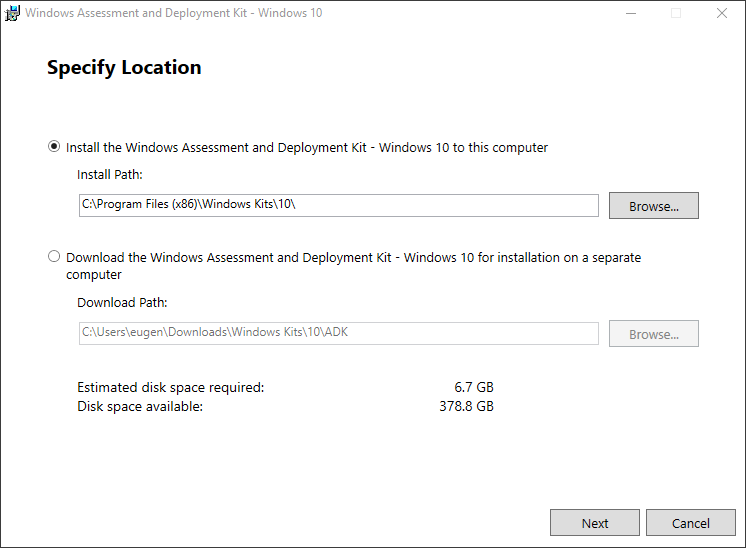
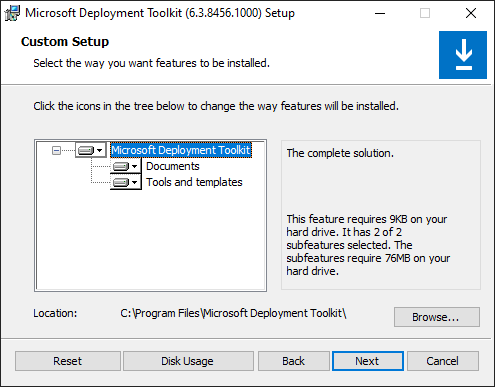
For the actual components, we can select just the minimum needed by MDT, listed below.
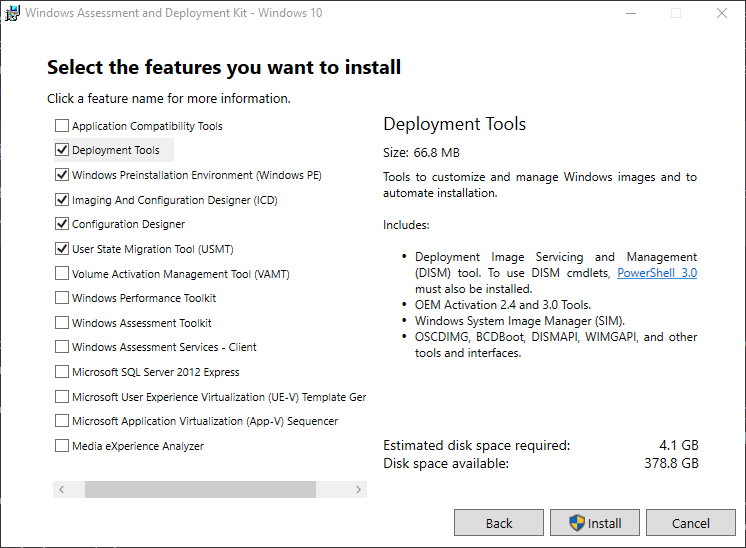
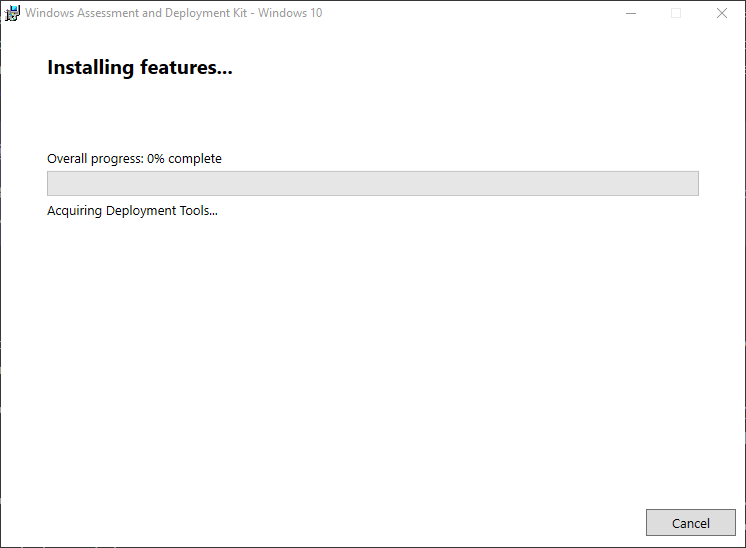
Then just wait for the installation files to download and install.
Once done, you can return to MDT.
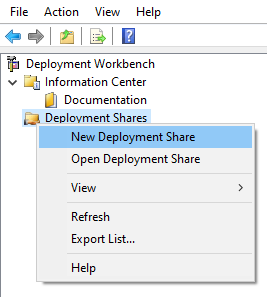
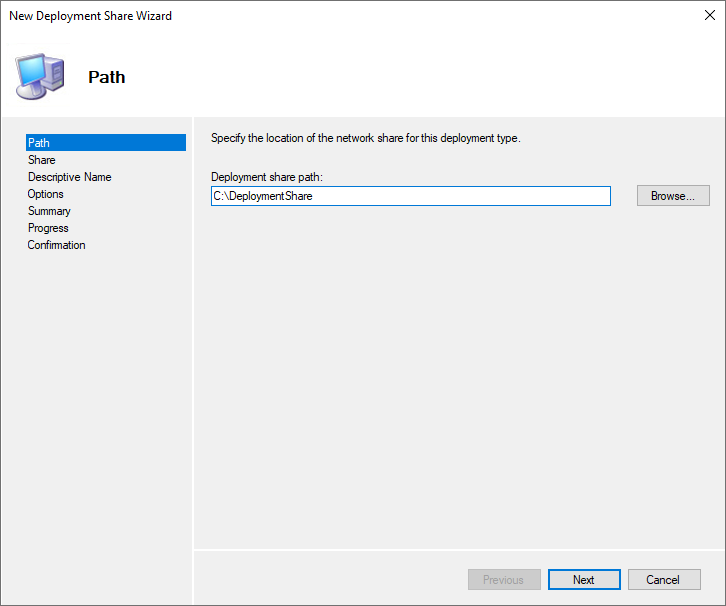
Create New Deployment Share
In MDT, right click Deployment Shares and select New Deployment Share.
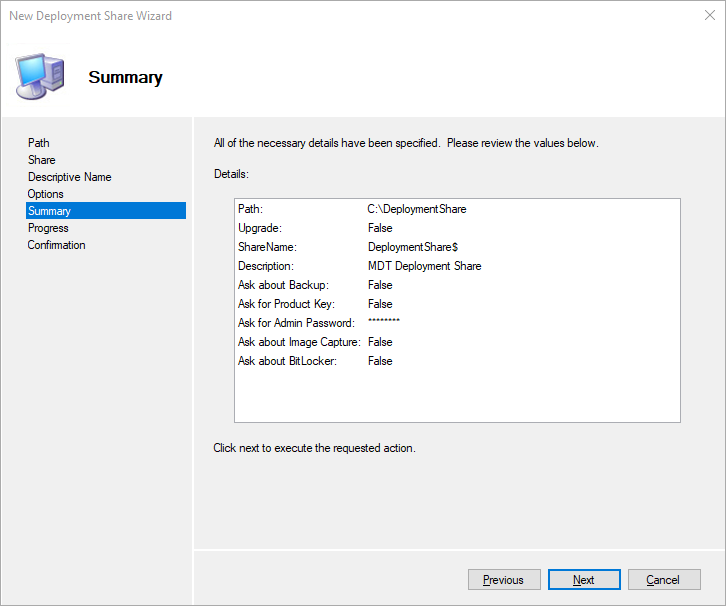
This defaults to a new folder on the root of your C: drive. This is fine, but you can change it if you wish.
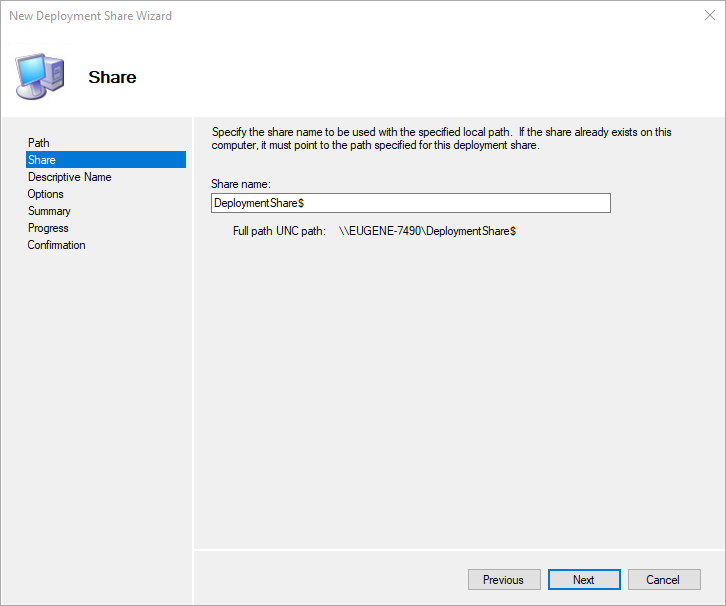
MDT also shares this folder, and the defaults here is ok.
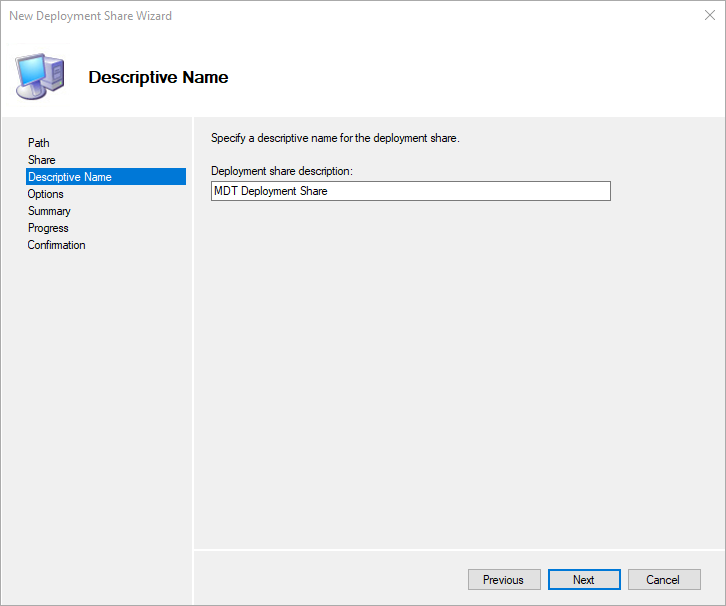
Default name is fine.
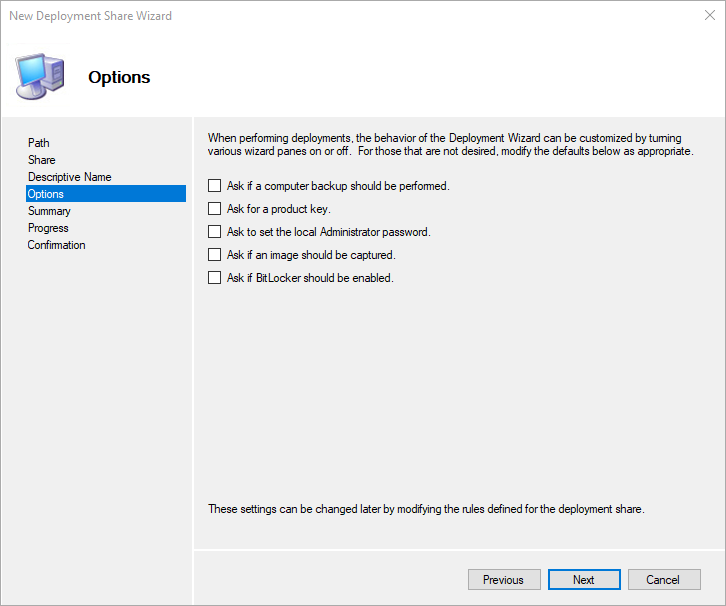
We will uncheck all the options here, because of our use case, where we are not doing upgrades. We will only be doing clean wipes. But you can ticks some options if it fits your use case.
Click Next and Finish on the next 2 screens.
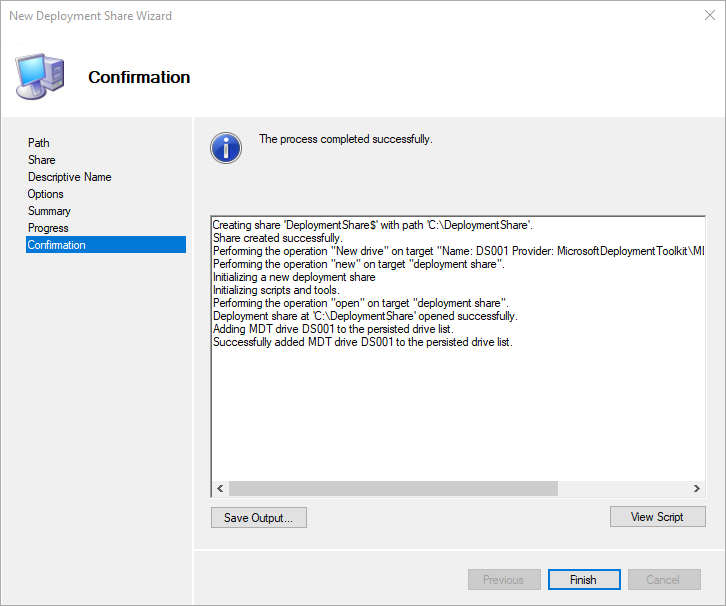
Your MDT share is created.

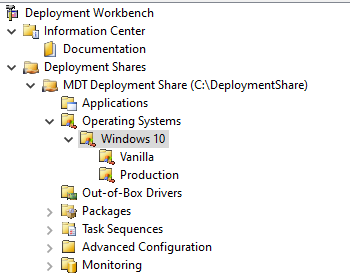
The default layout looks fine, and we can make use of it like this, but for efficient and selection later, we will need to create a few subfolders under Operating Systems.
We will want to add a new local user we use for connecting to the deployment share, instead of your own account. Or it could be a service account if you have the infrastructure for such a thing. In my case here, where I’m just doing this on my laptop, I will add a new local user.
$password = ConvertTo-SecureString 'YourPassword' -AsPlainText -Force

New-LocalUser "mdtuser" -Password $password -FullName "MDT User" -Description "MDT User Account"
You can also do this manually from the control panel or management console. You can replace YourPassword with your own password.
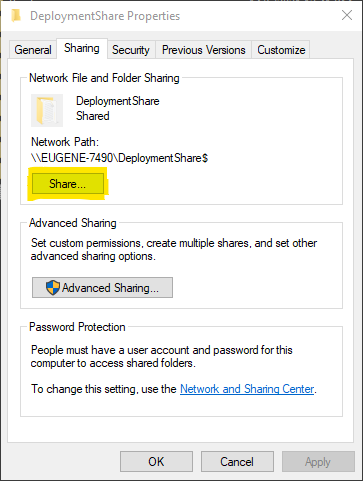
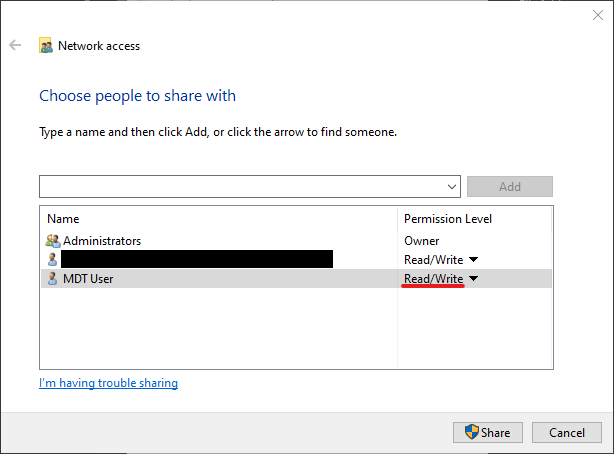
Now you can grant this new user access to the Deployment Share. Open the Properties of the Deployment Share, select the Sharing tab and click Share.
Select MDT User from the list and click Add.
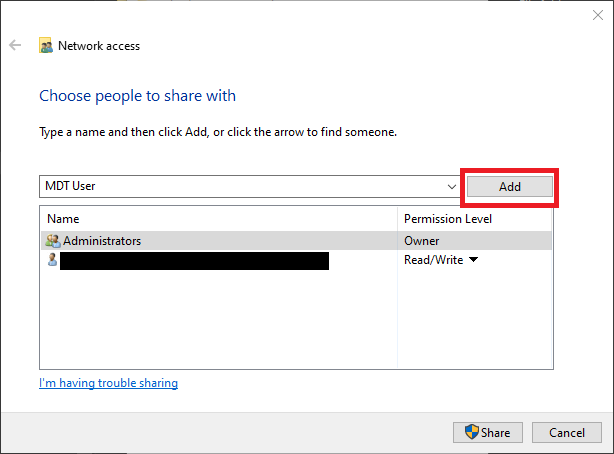
Change the permission level to Read/Write, and then click Share to save changes.
Now your share is ready, we can proceed to the next steps.
Reference Image Setup
Our reference image is our basic image with all the “basics” we need which can be use across multiple machines. So in this case here is what we want in our reference image.
- Basic installation of Windows 10
- Installation of Office 365
- Decrapifying Windows 10
- Custom Settings
- Show file name extensions
- Customized Start Menu layout
- Installation of all the latest Windows 10 patches
So in the next steps below, we get MDT ready to start creating our reference image.
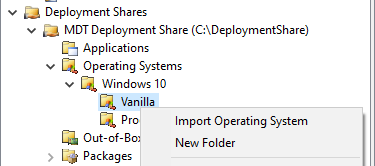
Import Windows 10 Image
Next we can import our vanilla Windows 10 image from the ISO file. You can double click the ISO file and Windows will mount the ISO file as a new drive, typically your D: drive or whatever the next drive letter available is.
In MDT, right click the Vanilla folder we created earlier and click Import Operating System.
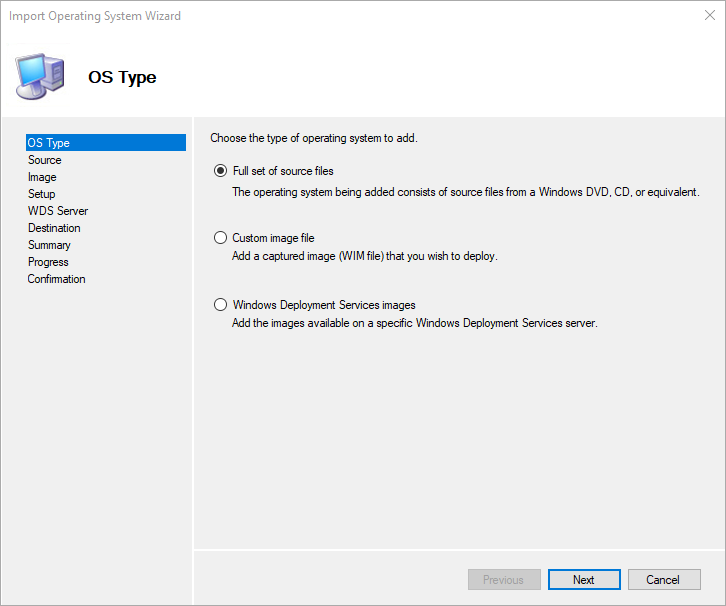
Since we are importing from the Windows ISO file (with is a DVD image), we select the first option, Full set of source files.
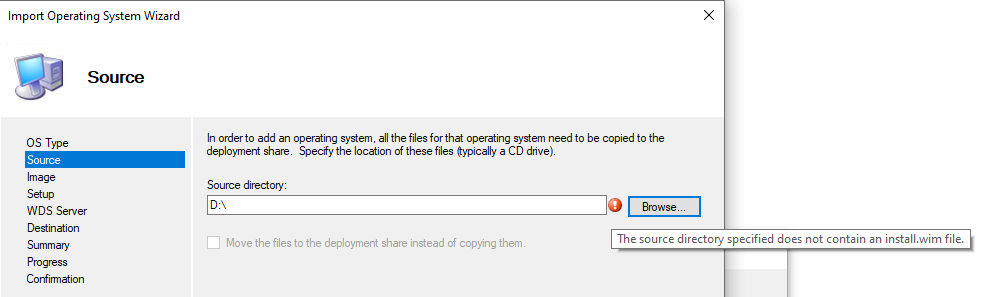
We then select the D: drive (or whatever your mounted ISO drive path is) but MDT does not find the files it needs here.
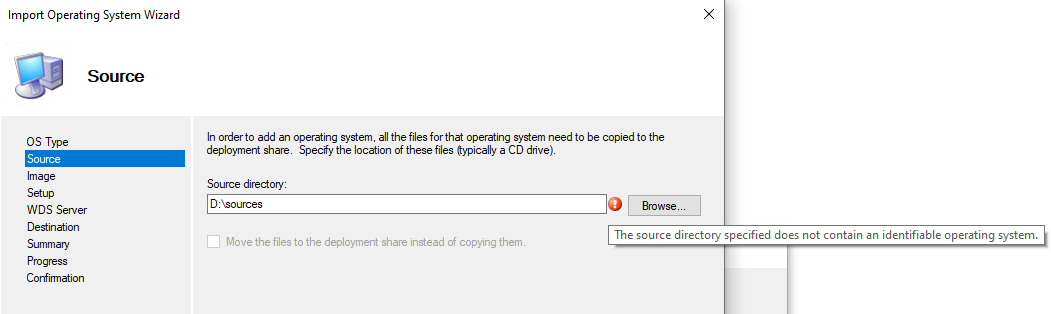
If we try the path D:\Sources, it is a different error.
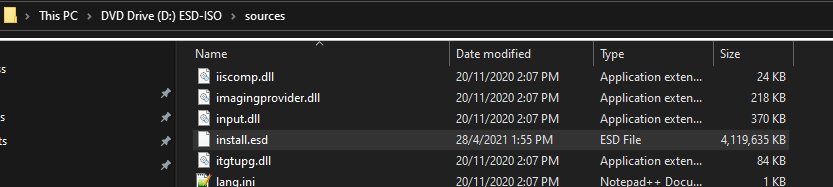
The reason for this is, the Media Creation tool created a multi version ISO file. The same ISO can be used to install Windows 10 Home, Windows 10 Education and Windows 10 Professional (and some of the N versions as well). Depending on the license key you use during installation, the correct version of Windows will be installed. If you install without a product key, you will be asked to select a version of Windows.
MDT expect a single version of Windows here. So we need to find this multi version file and get just the Professional version of Windows 10 out.
In D:\sources, there is a file called install.esd. Copy this file out to where you had the ISO file stored. In my case, I copied to C:\Apps\MDT\Tools.
From C:\Apps\MDT\Tools, you can run the following command.
dism /Get-WimInfo /WimFile:install.esdThis will output a list of files/version available in the ESD File.
Deployment Image Servicing and Management tool
Version: 10.0.19041.572
Details for image : install.esd

Index : 1
Name : Windows 10 Home
Description : Windows 10 Home
Size : 15,489,142,996 bytes

Index : 2
Name : Windows 10 Home N
Description : Windows 10 Home N
Size : 14,716,766,977 bytes

Index : 3
Name : Windows 10 Home Single Language
Description : Windows 10 Home Single Language
Size : 15,470,244,213 bytes

Index : 4
Name : Windows 10 Education
Description : Windows 10 Education
Size : 15,722,347,443 bytes

Index : 5
Name : Windows 10 Education N
Description : Windows 10 Education N
Size : 14,953,374,712 bytes

Index : 6
Name : Windows 10 Pro
Description : Windows 10 Pro
Size : 15,720,710,878 bytes

Index : 7
Name : Windows 10 Pro N
Description : Windows 10 Pro N
Size : 14,955,666,348 bytes
Since I want Windows 10 Professional, I need to extract from Index 6. Use the command below to extract the WIM file.
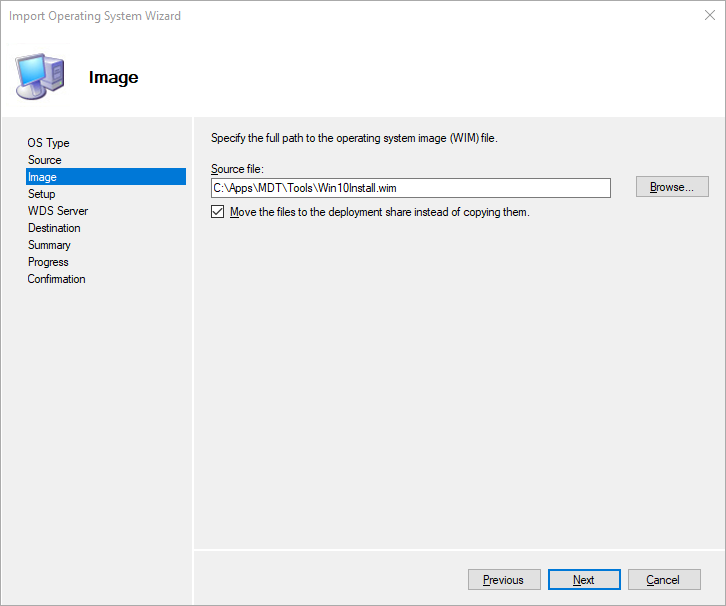
dism /export-image /SourceImageFile:install.esd /SourceIndex:6 /DestinationImageFile:Win10Install.wim /Compress:max /CheckIntegrityThis will take a while to complete. Once done, you can return to MDT and choose to import a WIM file now.

Select the WIM file which was extracted. You can tick to move the file over to the deployment share, since we do not need it the Tools folder anymore.
You can click next through the next few screens, accepting the defaults. Once done, the image will appear with a rather strange and long name.
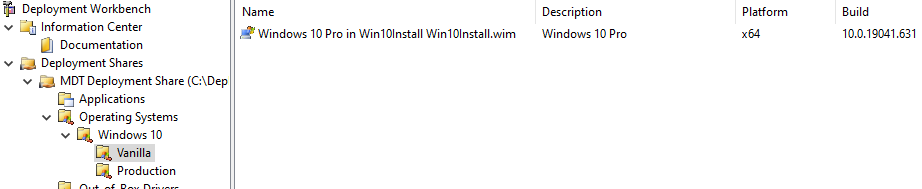
Which you can rename to something shorter and easier to identify.
Create New Application
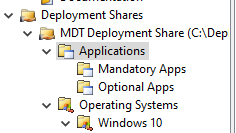
For applications, it is also good to create some subfolder. I’m using the 2 subfolder below, you can add more if you like.
Office 365
Next we will configure Office 365 to install silently. But first, we have some work to do. The office deployment toolkit (ODT) needs a XML file from which ODT will download and install Office 365. Microsoft has some guidance on how to create this file manually, but they also provide a tool to help you create this XML file here.
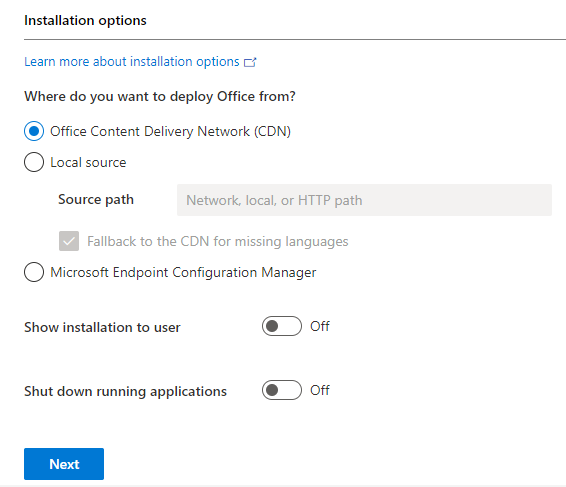
It can get quite confusing, but for most home users, the following should work. I’m using the 64bit version of Office, using the Current Channel and get the latest version. I’m also excluding a few apps, like Skype for Business, OneDrive for Business and Teams.
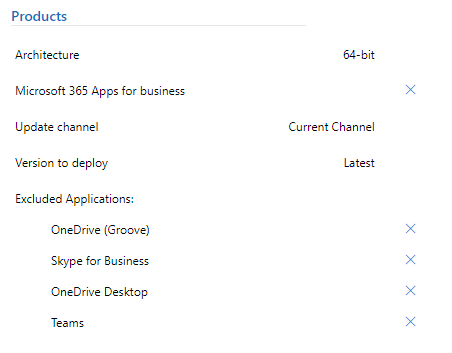
I’m also always going to download the source files from Microsoft, so I select the CDN here. Also, I’m not going to show any installation interface to the user.
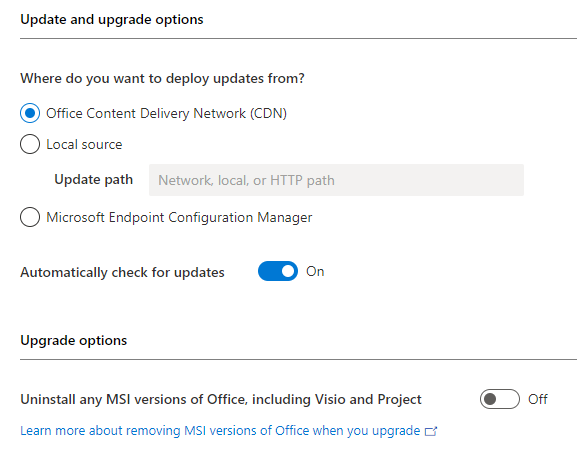
Pretty similar settings for the updates as well, and allowing checks for updates. Since this is a clean installation, I do not need to uninstall any previous MSI installations.
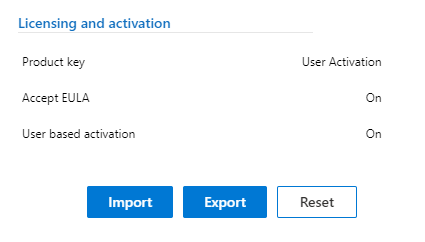
The licensing is have is user based, and activation is also user based. Accept EULA is also selected. Then just click Export to generate your XML file.
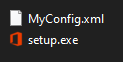
Once you have your XML file, your Office folder should now have the setup.exe file and your config file.
You can start the download of files with the following command:
setup.exe /download MyConfig.xmlYou will see a new Office folder added and some CAB files downloaded in this folder. Once done, we can import Office 365 into MDT.
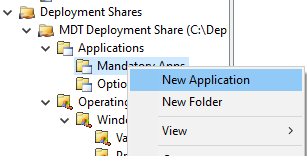
Right click on the Mandatory Apps and select New Application.
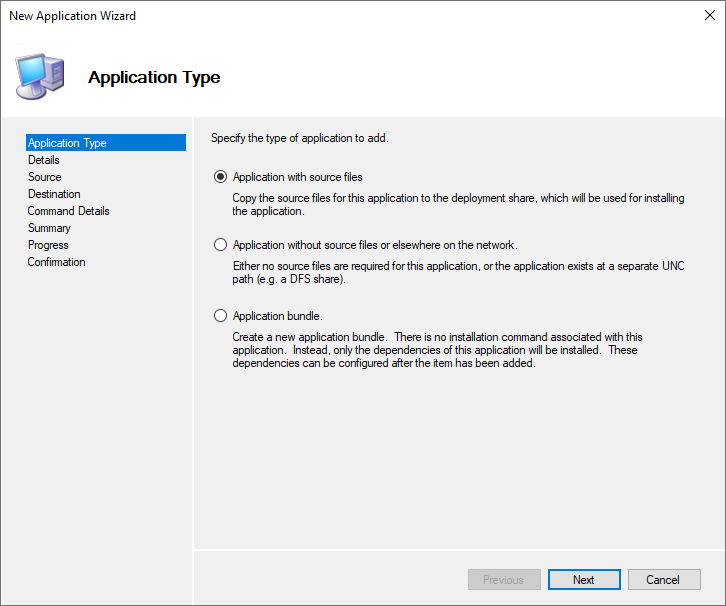
Select Application with source files and click Next.
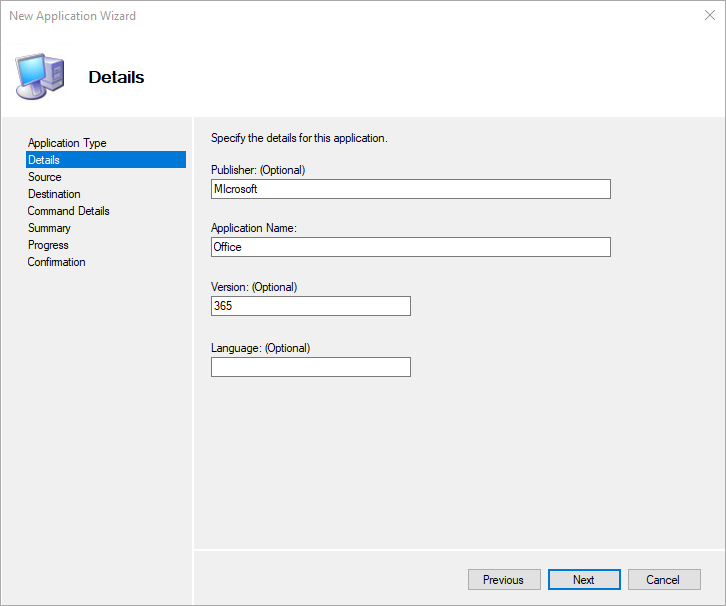
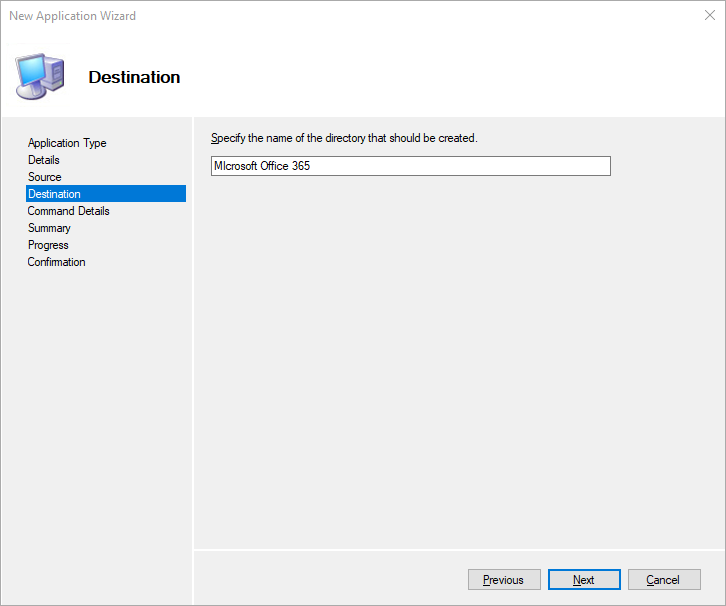
Fill in the application details. MDT uses this information to create the application name. You need at least the Application Name, so other field can be blank.
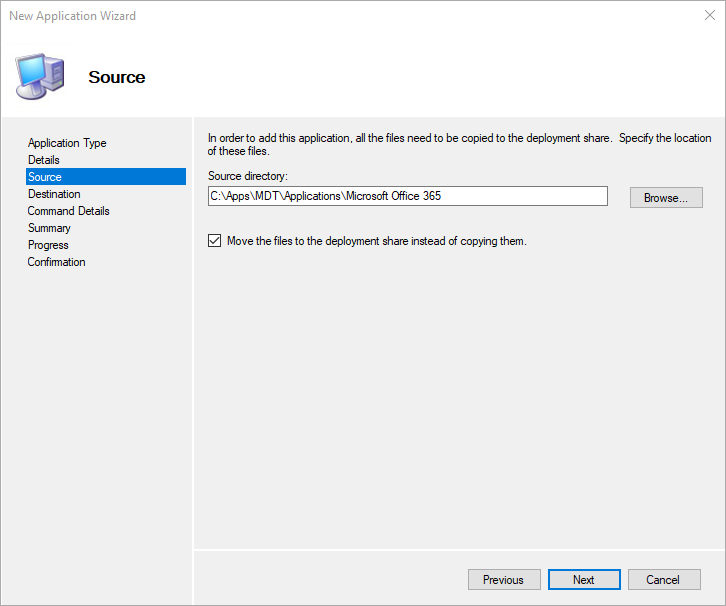
Select the folder where the Office installation files are located. You can choose to move the files or untick to just copy the files. Leaving it could be useful if we want to get the latest Office files again later.
The default name here is fine.
We then need to key in the installation command line. The command line is:
setup.exe /configure MyConfig.xml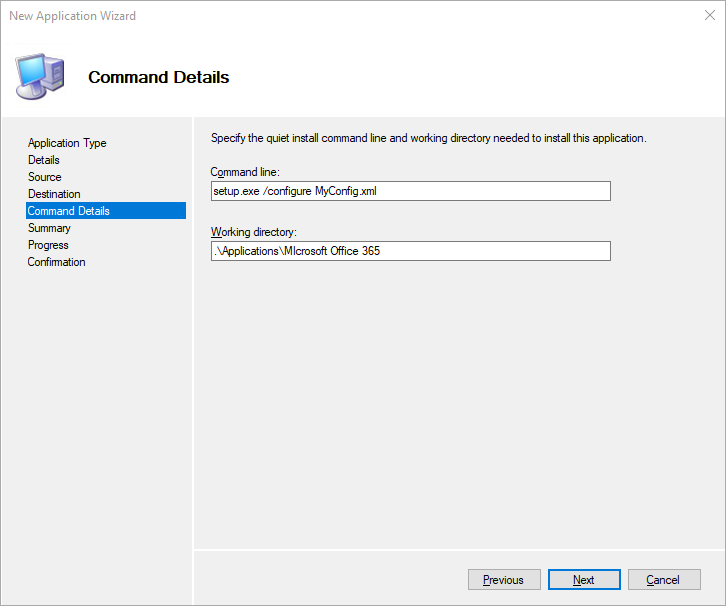
You can click next till the end. Note the View Script button. You might want to make note of this, if you want to frequently add updates Office versions, and want to automate the process. We won’t be doing this for now. Click Finish.
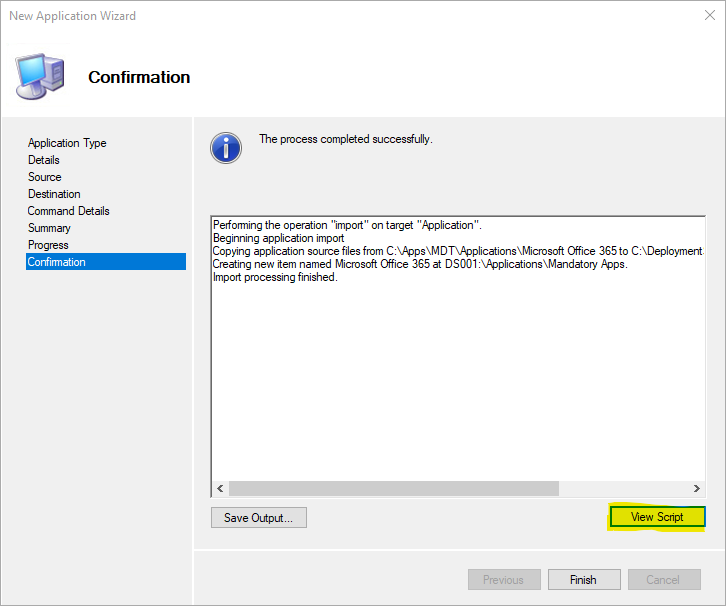
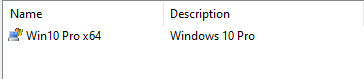
Now we have our first application created in MDT.
Decrapifying Windows 10
You can read more about Windows 10 Decrapifier here. It is a useful script for us as it cleans and sets up Windows 10 with some customizations as well. In our example here, we will use this script to clean up Windows 10 but leave OneDrive intact. We will also add our own Start Menu layout.
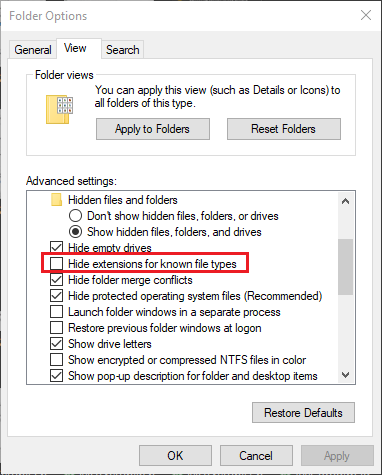
We will also modify the script to set the Show Filename Extensions for all users. To basically uncheck the option below.
First we will tackle the start menu layout. The easiest way to get a custom menu layout across several machines is to first set it up on 1 machine as you like, and then export the layout. You can refer to this article for more information on export your start menu layout.
In my case, I have already done this. My layout is:
- First group, 1 row, called Productivity
- Microsoft Photos
- Microsoft Edge
- Windows Store
- Second group, 2 rows, called Office
- Word
- Excel
- Publisher
- Powerpoint
- Outlook
- Onenote
The XML for this layout is:
<LayoutModificationTemplate xmlns:defaultlayout="http://schemas.microsoft.com/Start/2014/FullDefaultLayout" xmlns:start="http://schemas.microsoft.com/Start/2014/StartLayout" Version="1" xmlns="http://schemas.microsoft.com/Start/2014/LayoutModification">
  <LayoutOptions StartTileGroupCellWidth="6" />
  <DefaultLayoutOverride>
    <StartLayoutCollection>
      <defaultlayout:StartLayout GroupCellWidth="6">
        <start:Group Name="Productivity">
          <start:Tile Size="2x2" Column="2" Row="0" AppUserModelID="Microsoft.Windows.Photos_8wekyb3d8bbwe!App" />
          <start:DesktopApplicationTile Size="2x2" Column="0" Row="0" DesktopApplicationLinkPath="%ALLUSERSPROFILE%\Microsoft\Windows\Start Menu\Programs\Microsoft Edge.lnk" />
          <start:Tile Size="2x2" Column="4" Row="0" AppUserModelID="Microsoft.WindowsStore_8wekyb3d8bbwe!App" />
        </start:Group>
        <start:Group Name="Office">
          <start:DesktopApplicationTile Size="2x2" Column="0" Row="0" DesktopApplicationLinkPath="%ALLUSERSPROFILE%\Microsoft\Windows\Start Menu\Programs\Word.lnk" />
          <start:DesktopApplicationTile Size="2x2" Column="2" Row="0" DesktopApplicationLinkPath="%ALLUSERSPROFILE%\Microsoft\Windows\Start Menu\Programs\Excel.lnk" />
          <start:DesktopApplicationTile Size="2x2" Column="4" Row="2" DesktopApplicationLinkPath="%ALLUSERSPROFILE%\Microsoft\Windows\Start Menu\Programs\Publisher.lnk" />
          <start:DesktopApplicationTile Size="2x2" Column="4" Row="0" DesktopApplicationLinkPath="%ALLUSERSPROFILE%\Microsoft\Windows\Start Menu\Programs\PowerPoint.lnk" />
          <start:DesktopApplicationTile Size="2x2" Column="0" Row="2" DesktopApplicationLinkPath="%ALLUSERSPROFILE%\Microsoft\Windows\Start Menu\Programs\Outlook.lnk" />
          <start:DesktopApplicationTile Size="2x2" Column="2" Row="2" DesktopApplicationLinkPath="%ALLUSERSPROFILE%\Microsoft\Windows\Start Menu\Programs\OneNote.lnk" />
        </start:Group>
      </defaultlayout:StartLayout>
    </StartLayoutCollection>
  </DefaultLayoutOverride>
</LayoutModificationTemplate>
In the script file, there is a variable called $StartLayoutStr which we will replace with our own layout. This is about line 95 in the script.
Before
$StartLayoutStr = @"
<LayoutModificationTemplate Version="1" xmlns="http://schemas.microsoft.com/Start/2014/LayoutModification">
  <LayoutOptions StartTileGroupCellWidth="6" />
  <DefaultLayoutOverride>
    <StartLayoutCollection>
      <defaultlayout:StartLayout GroupCellWidth="6" xmlns:defaultlayout="http://schemas.microsoft.com/Start/2014/FullDefaultLayout">
        <start:Group Name="" xmlns:start="http://schemas.microsoft.com/Start/2014/StartLayout">
          <start:DesktopApplicationTile Size="2x2" Column="0" Row="0" DesktopApplicationLinkPath="%APPDATA%\Microsoft\Windows\Start Menu\Programs\System Tools\File Explorer.lnk" />
          <start:DesktopApplicationTile Size="2x2" Column="2" Row="0" DesktopApplicationLinkPath="%ALLUSERSPROFILE%\Microsoft\Windows\Start Menu\Programs\Accessories\Snipping Tool.lnk" />
		  <start:DesktopApplicationTile Size="2x2" Column="0" Row="2" DesktopApplicationLinkPath="%APPDATA%\Microsoft\Windows\Start Menu\Programs\System Tools\Control Panel.lnk" />
        </start:Group>
      </defaultlayout:StartLayout>
    </StartLayoutCollection>
  </DefaultLayoutOverride>
</LayoutModificationTemplate>
"@
After
$StartLayoutStr = @"
<LayoutModificationTemplate xmlns:defaultlayout="http://schemas.microsoft.com/Start/2014/FullDefaultLayout" xmlns:start="http://schemas.microsoft.com/Start/2014/StartLayout" Version="1" xmlns="http://schemas.microsoft.com/Start/2014/LayoutModification">
  <LayoutOptions StartTileGroupCellWidth="6" />
  <DefaultLayoutOverride>
    <StartLayoutCollection>
      <defaultlayout:StartLayout GroupCellWidth="6">
        <start:Group Name="Productivity">
          <start:Tile Size="2x2" Column="2" Row="0" AppUserModelID="Microsoft.Windows.Photos_8wekyb3d8bbwe!App" />
          <start:DesktopApplicationTile Size="2x2" Column="0" Row="0" DesktopApplicationLinkPath="%ALLUSERSPROFILE%\Microsoft\Windows\Start Menu\Programs\Microsoft Edge.lnk" />
          <start:Tile Size="2x2" Column="4" Row="0" AppUserModelID="Microsoft.WindowsStore_8wekyb3d8bbwe!App" />
        </start:Group>
        <start:Group Name="Office">
          <start:DesktopApplicationTile Size="2x2" Column="0" Row="0" DesktopApplicationLinkPath="%ALLUSERSPROFILE%\Microsoft\Windows\Start Menu\Programs\Word.lnk" />
          <start:DesktopApplicationTile Size="2x2" Column="2" Row="0" DesktopApplicationLinkPath="%ALLUSERSPROFILE%\Microsoft\Windows\Start Menu\Programs\Excel.lnk" />
          <start:DesktopApplicationTile Size="2x2" Column="4" Row="2" DesktopApplicationLinkPath="%ALLUSERSPROFILE%\Microsoft\Windows\Start Menu\Programs\Publisher.lnk" />
          <start:DesktopApplicationTile Size="2x2" Column="4" Row="0" DesktopApplicationLinkPath="%ALLUSERSPROFILE%\Microsoft\Windows\Start Menu\Programs\PowerPoint.lnk" />
          <start:DesktopApplicationTile Size="2x2" Column="0" Row="2" DesktopApplicationLinkPath="%ALLUSERSPROFILE%\Microsoft\Windows\Start Menu\Programs\Outlook.lnk" />
          <start:DesktopApplicationTile Size="2x2" Column="2" Row="2" DesktopApplicationLinkPath="%ALLUSERSPROFILE%\Microsoft\Windows\Start Menu\Programs\OneNote.lnk" />
        </start:Group>
      </defaultlayout:StartLayout>
    </StartLayoutCollection>
  </DefaultLayoutOverride>
</LayoutModificationTemplate>
"@
Then we want to add our registry settings to show file extensions. At around like 404, we find:
#End user registry settings
}
We will add our registry just above this line.
	Reg Add "$reglocation\Software\Microsoft\Windows\CurrentVersion\Explorer\Advanced" /T REG_DWORD /V "HideFileExt" /D 0 /F
#End user registry settings
}
Save the script, and then copy it to the scripts folder of your deployment share (with the defaults selected before, this is C:\DeploymentShare\Scripts).
Next we will move on to the Windows Updates.
Windows Updates
I will show you the 3 options you can use here, but you will need to select what works best for you
My preference for speed is to use WSUS Offline and for effective updates to use PSWindowsUpdates
WSUS Offline CE
We will create a folder called WSUS in our deployment share (C:\DeploymentShare\WSUS). This is where we will store our WSUS Offline update files.
Run WSUS Offline. We will select only the latest Windows 10 x64 version. We will also select to include Windows Defender definitions. Finally, we will tick to copy the updates into our WSUS folder in our deployment share (C:\DeploymentShare\WSUS). Also tick to clean up the target directory. Then click Start.
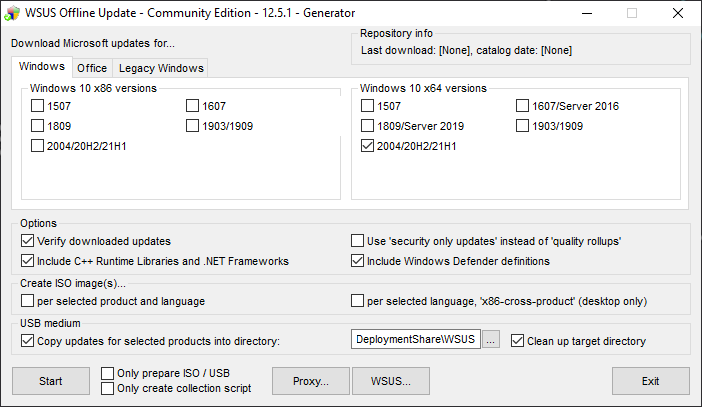
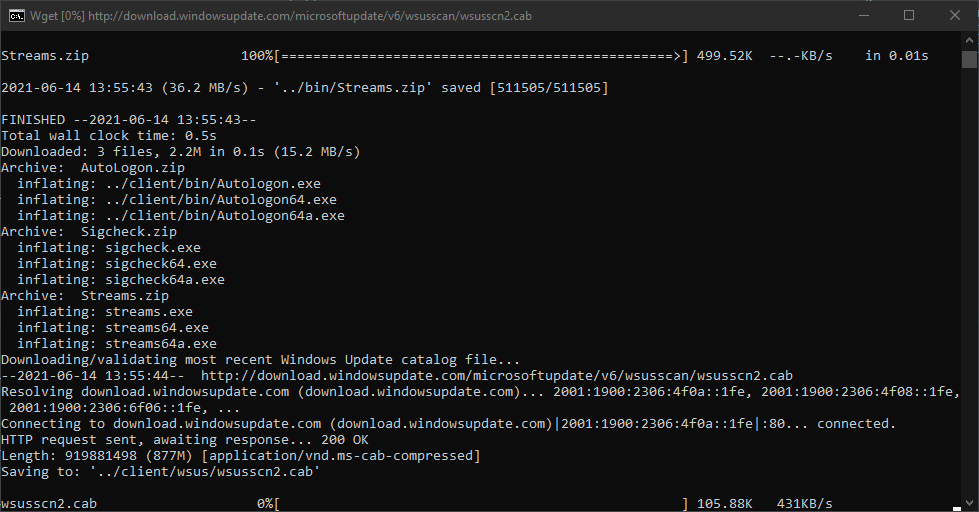
WSUS Offline will start downloading updates. This will take a while, so let it run in the background.
Once done, the update files will be available in C:\DeploymentShare\WSUS.

PSWindowsUpdate Powershell Module
If you have already extracted the files into the folder structure of PSWindowsUpdate\2.2.0.2, then you just need to copy this folder into your Deployment Share script folder (C:\DeploymentShare\Scripts)
MDT Windows Update Task Sequence Step
There is no prep work for this step. We will just enable it in the task sequence later
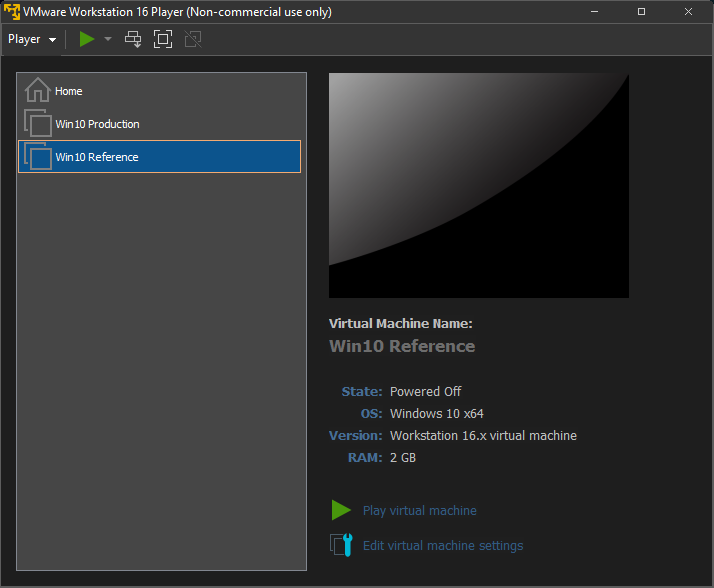
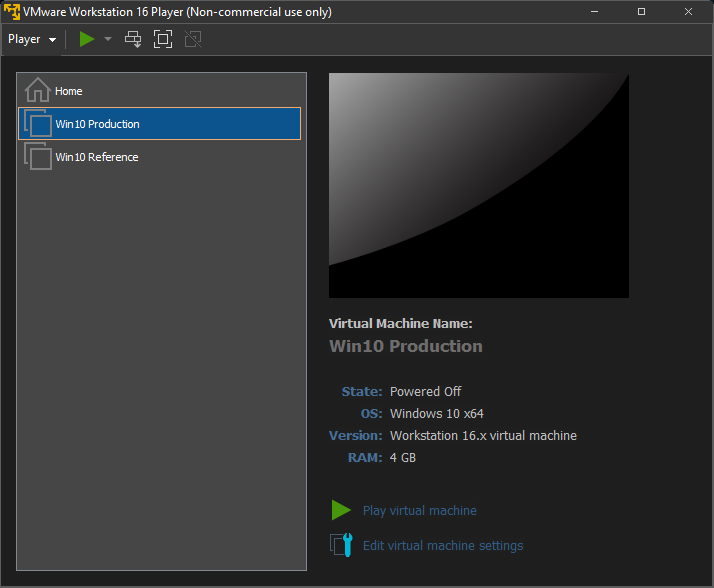
Create Virtual Machines
We now should have all we need in place, but lets also create our virtual machines at this time. You can adapt this as you need. We will need to create 2 machines. 1 machine as the reference image. 1 machine for production build testing.
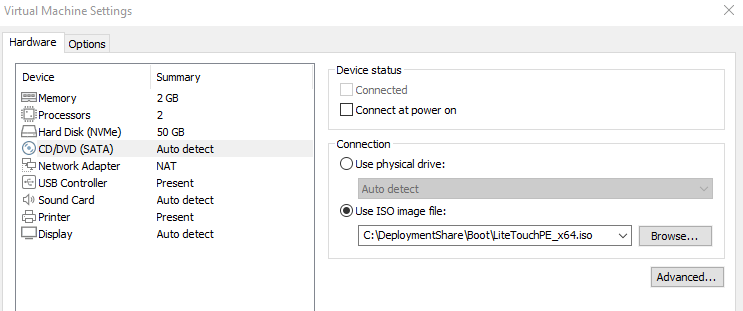
For the reference image, I gave the VM about 2GB of RAM and 50GB hard disk space.
For the production testing, I gave the VM about 4GB of RAM and 60GB hard disk space.
Create Reference Image Task Sequence
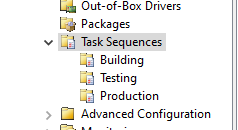
So we have all we need in place now. For organizing purposes, we will also create a folder structure for our task sequences. This will become useful later when we create selection profiles.
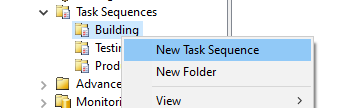
In the Building folder, choose to create a new task sequence.
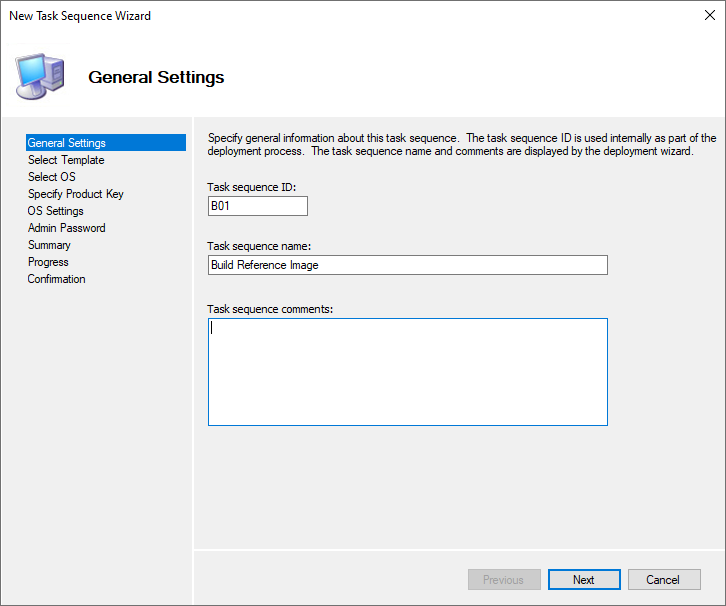
Key in details below. This just needs to be unique and easy for you to identify.
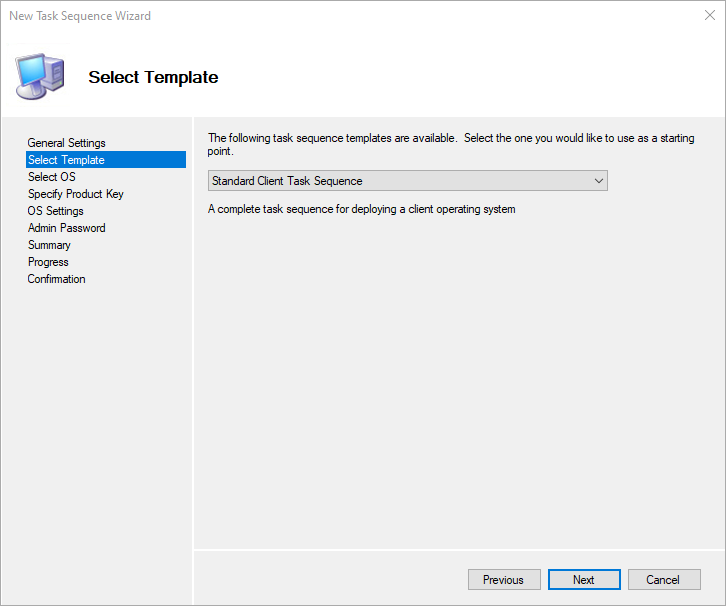
Select the Standard Client Task Sequence.
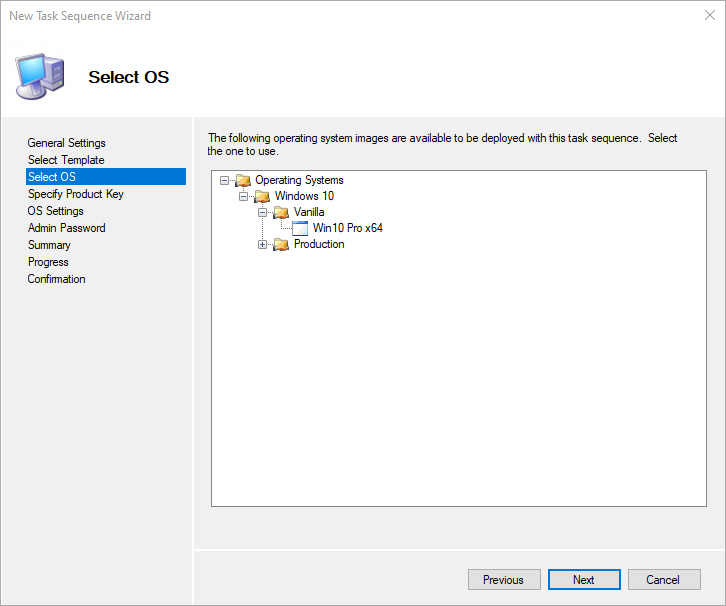
Select the Windows 10 image we imported earlier.
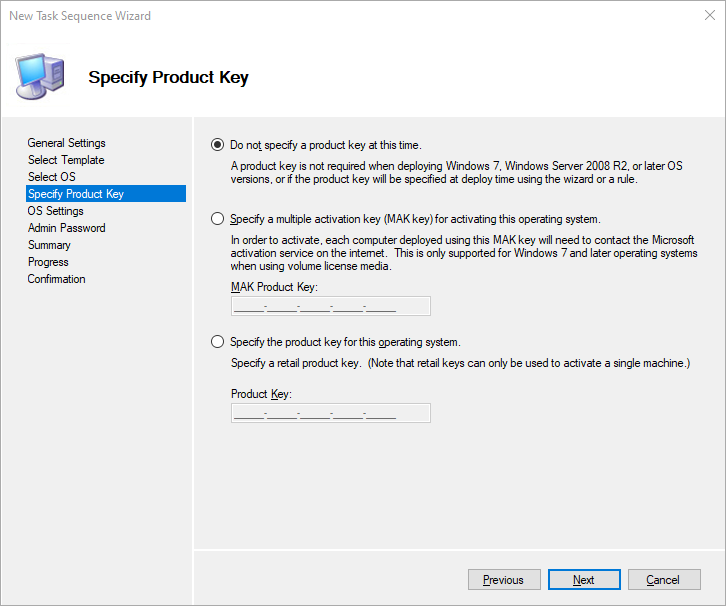
Choose to not specify a product key.
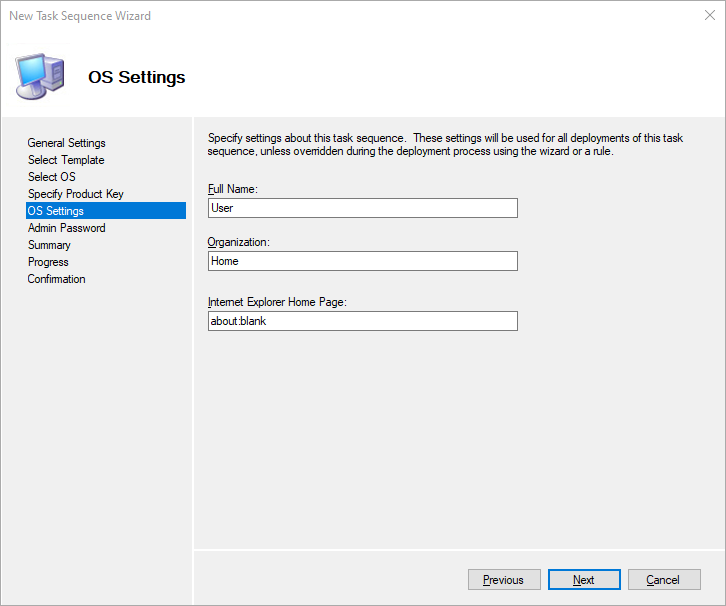
Key in the basic details as you see fit.
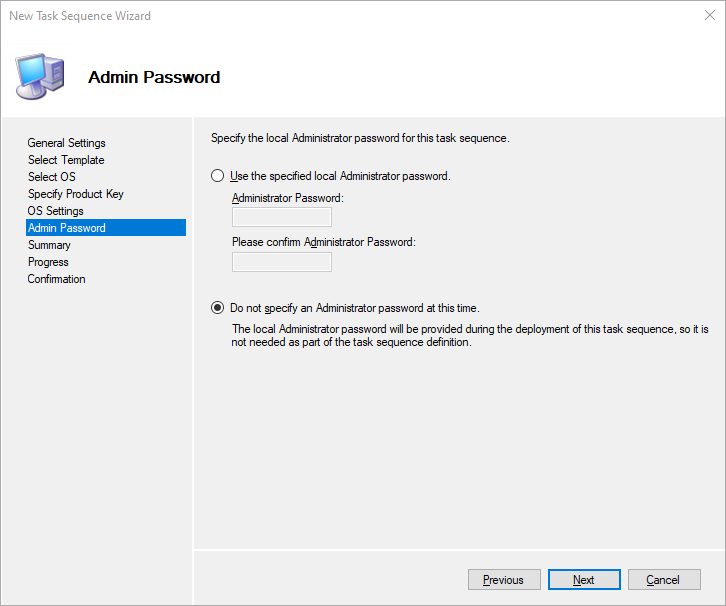
Choose not to specify a Administrator password.
Click Next to start creating the task sequence and wait for it to finish.
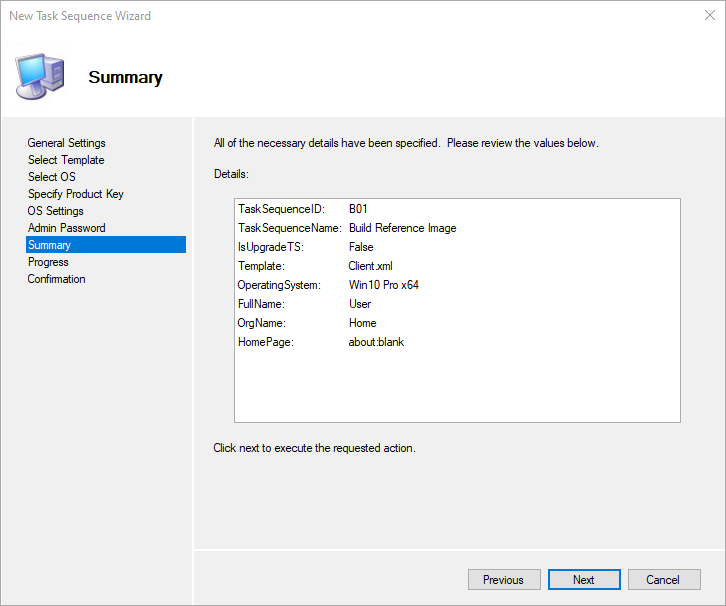
Click Finish.

And your task sequence is ready! Take a short break if you like, relax and pat yourself on your back. Great job!
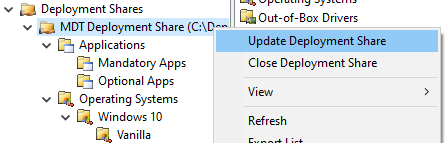
Before we get to far, we want to do a quick test to make sure our task sequence works. So now we need to update the deployment share.
Right click the deployment share and choose to update deployment share.
Since this is the first time, we will choose to completely regenerate the images. Then click Next.
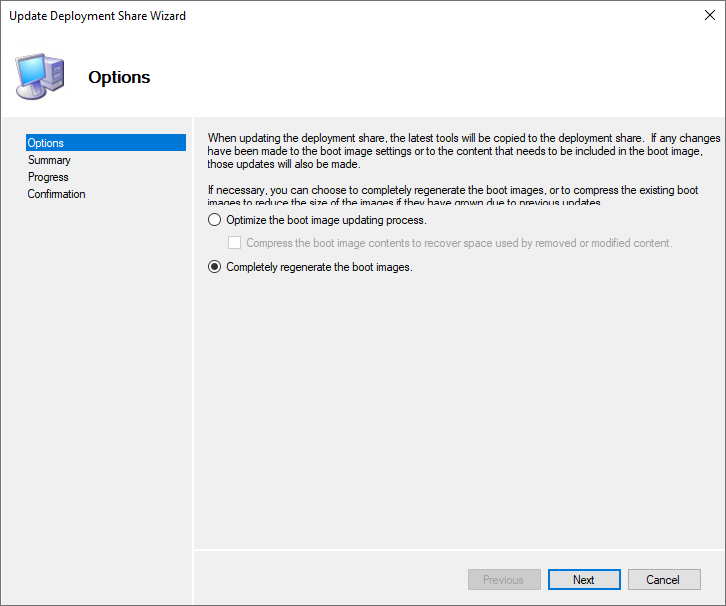
Then click next again and wait for the process to complete.

Once it is done, we can do a quick test to make sure everything is working as expected.
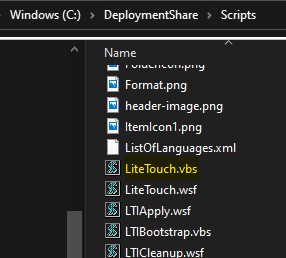
Go to your deployment share, in the script folder, double click LiteTouch.vbs.
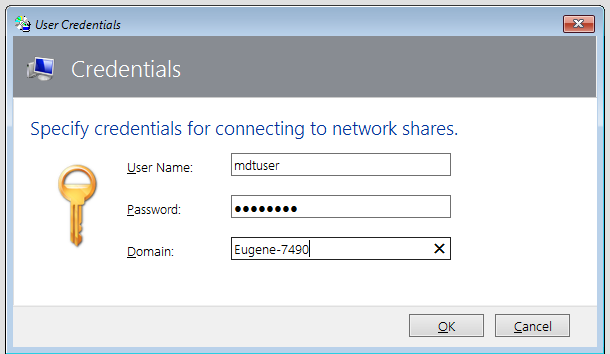
You should see a prompt for credentials to access the deployment share. Key in the MDTUser details we created earlier.
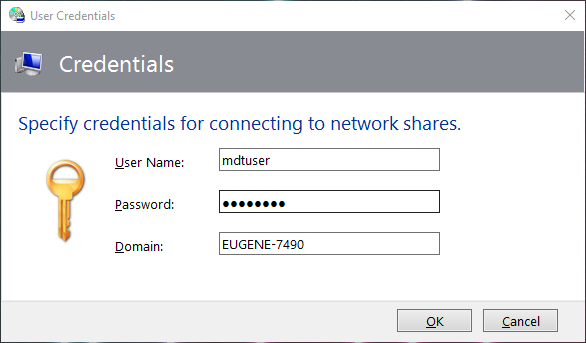
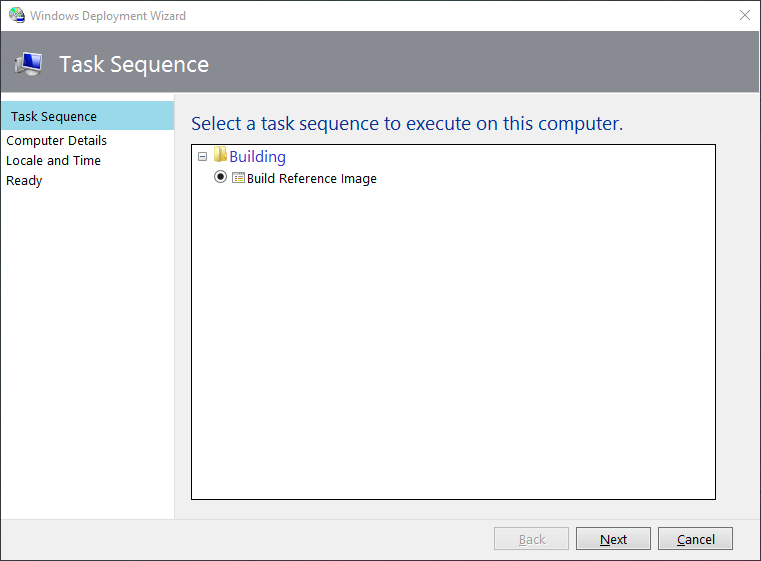
If our MDTUser credentials were correct, we will now see the task sequence available for us to run. DO NOT CLICK NEXT. Click Cancel instead.
CLICK CANCEL!! I hope you did and did not accidentally reimage your own machine 🙂
One thing to note now is the log files generated. Your root drive will have a folder called C:\MININT\SMSOSD.
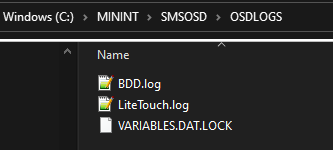
The logs just say user cancelled the installation. For any troubleshooting later, you need to know where the logs are.
Test Reference Image Task Sequence
We have not added any customizations yet but let us just test to make sure the basics are working, and we can try again with our customizations later.
On our reference VM, we need to set it to boot from the Lite ISO file.
Then you can start the virtual machine and boot from this DVD image. The first welcome screen should appear. Click the first option to Run the Deployment Wizard.

Next, key in the MDTUser credentials. Domain here is your host machine name.
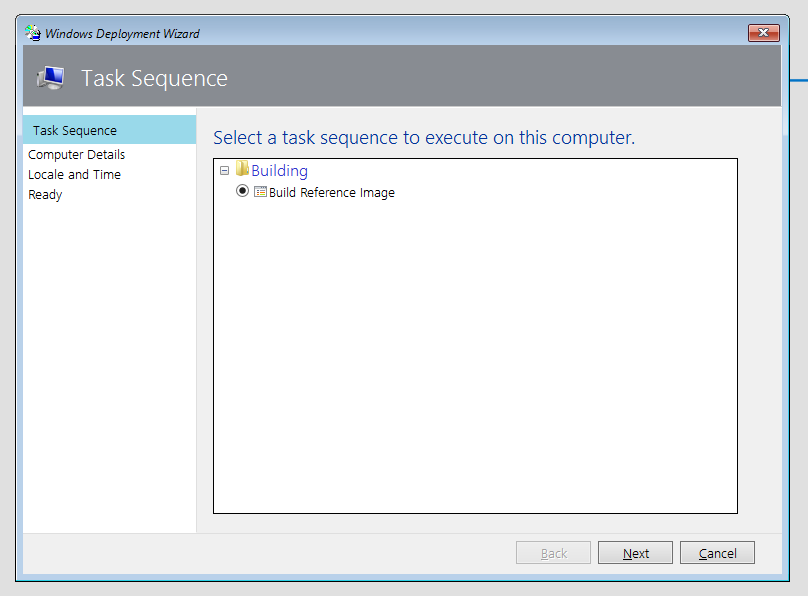
Since there is only 1 task sequence now, we will select it and click Next.
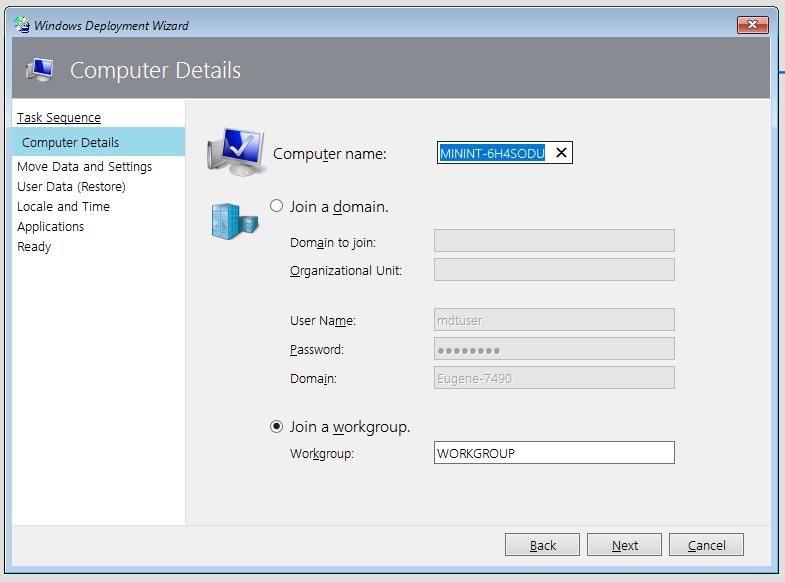
We can leave the defaults here and click Next.
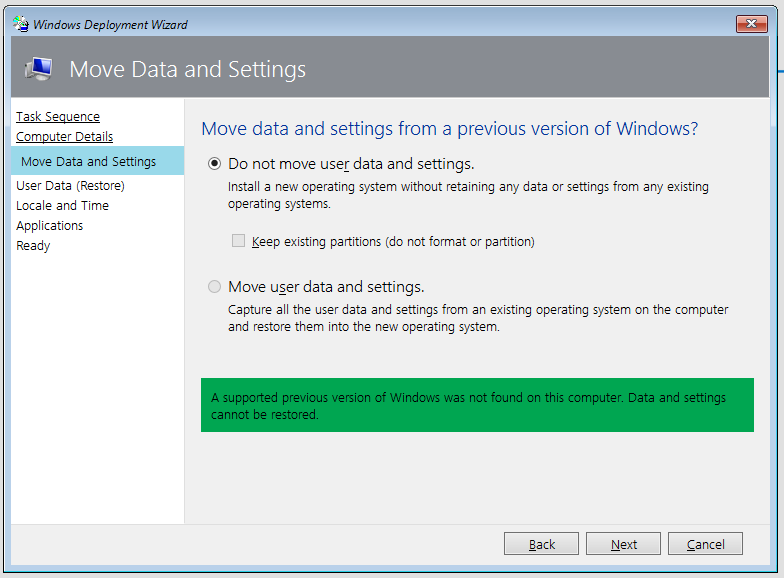
We are running bare metal, so we can only select to not move user data and settings.
We are also not going to restore any user data.

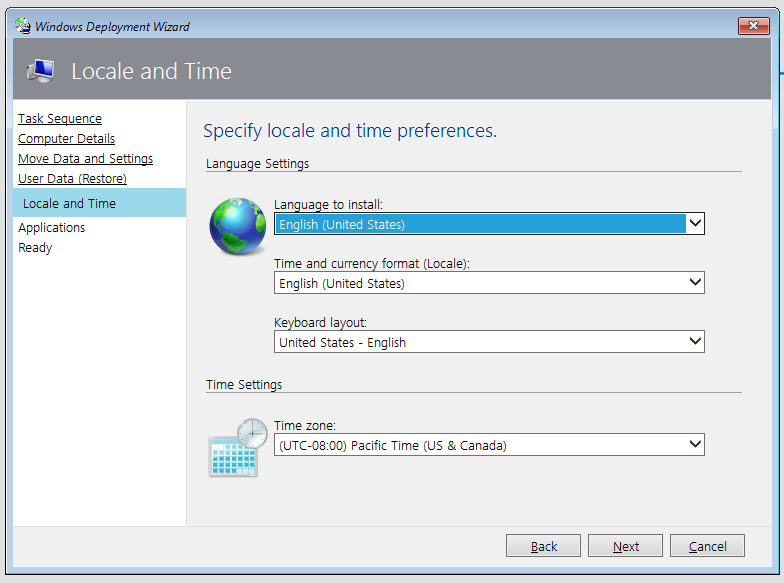
Select your language, locale, keyboard layout and timezone.
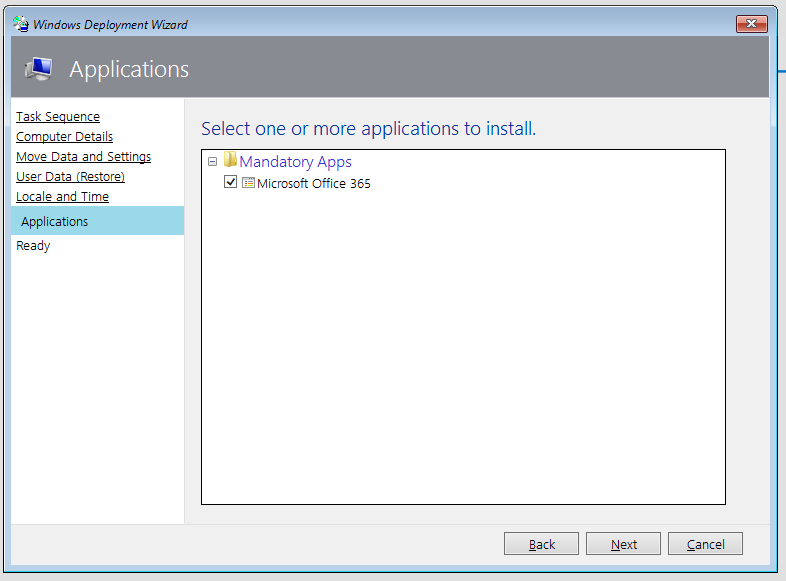
Select to install Microsoft Office 365.
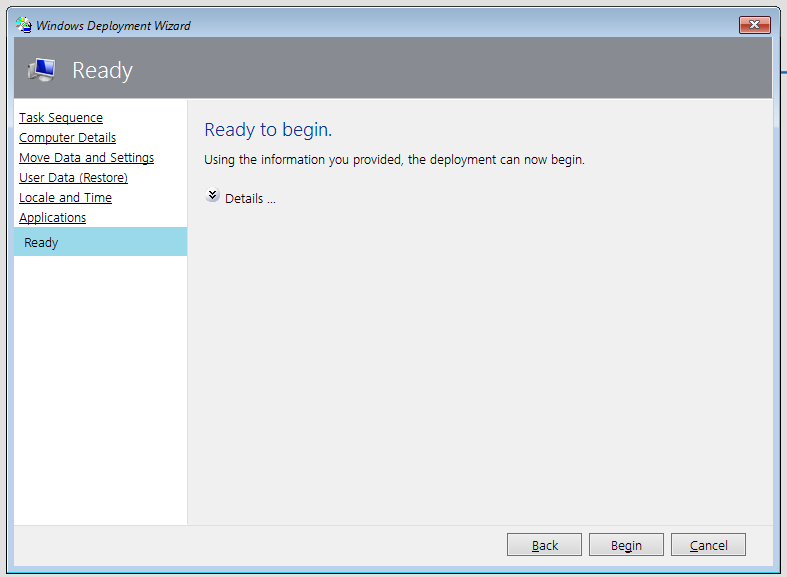
We can now keep our fingers crossed and click Begin.
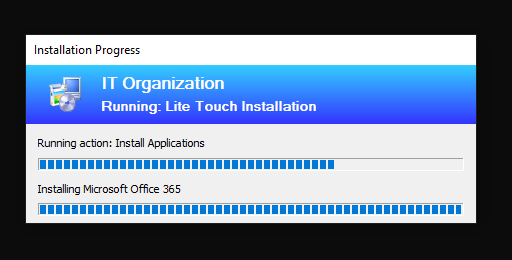
It will a while to complete, so relax and monitor to see what happens next. MDT will go through several steps, including several reboots before everything is ready.
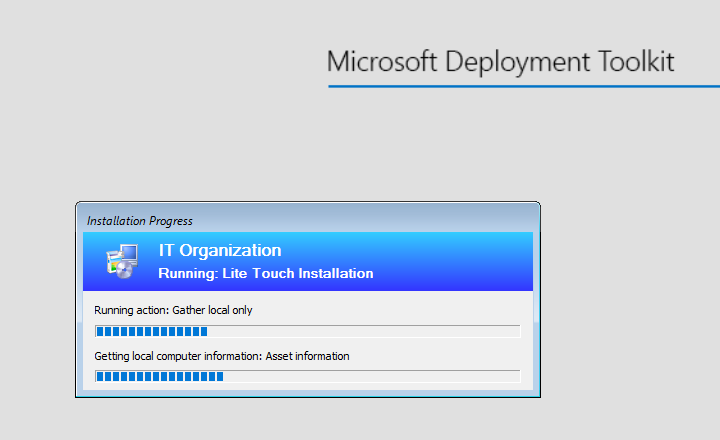
After the initial setup, Office 365 starts installing…
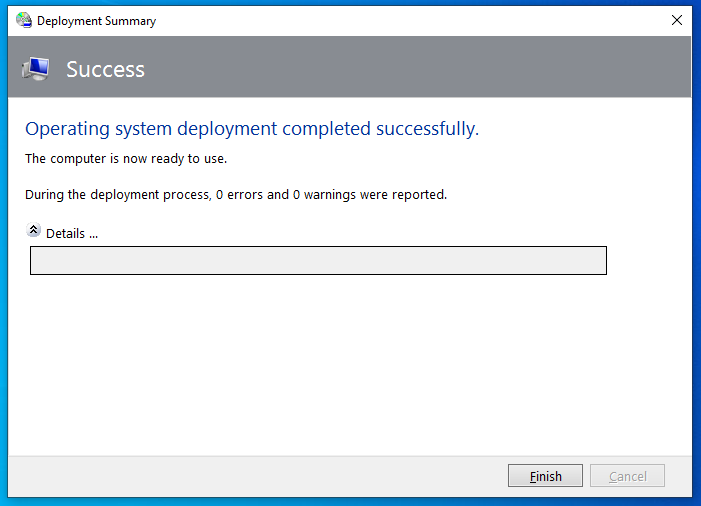
Once everything is complete, you will see the following message.
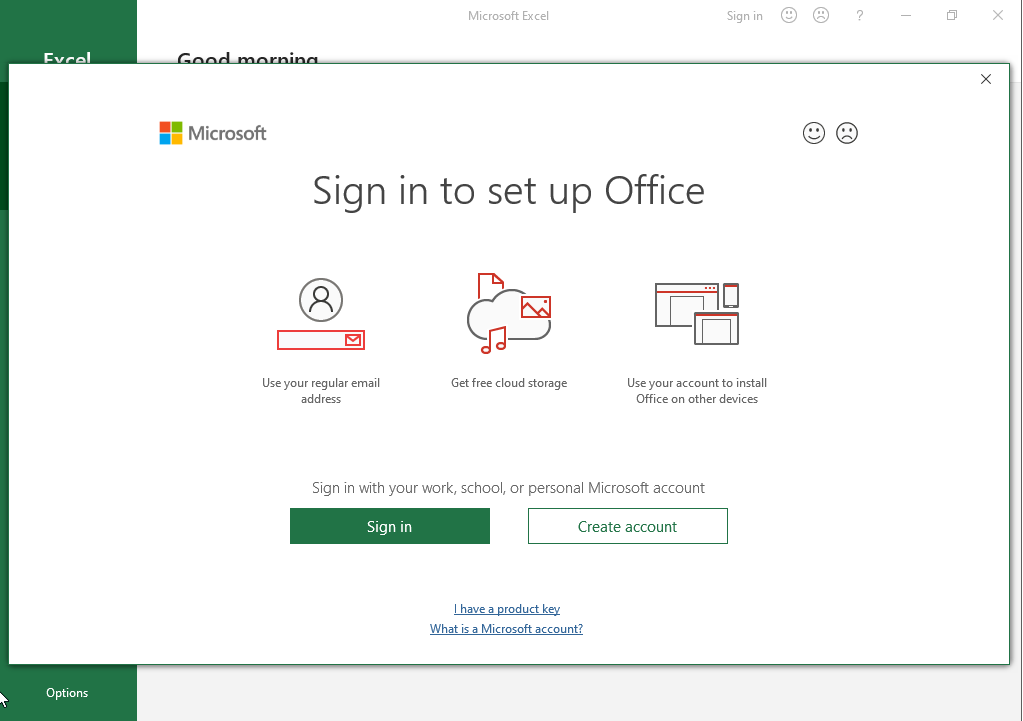
You can poke around the image and check things out. Excel launches fine.
Also the logs, if you need to check it, are located in C:\Windows\Temp\DeploymentLogs.
This part is getting a little long now. So, we will end here for part 2. In part 3, we will finish customizing our reference image task sequence and reduce the number of prompts needed. You can shutdown the reference image for now.
See you in part 3.