
This is article is part of a 5 part series. Refer to the other parts here
Introduction

Microsoft Deployment Toolkit (MDT) is a free tool for automating Windows OS deployments. It is sort of a scaled down SCCM if you like, with a focus on imaging. At an enterprise level, you will likely use SCCM, but for smaller companies, MDT might just do the trick, and even at home 🙂
So I tried this out as a project for use at home, since my kids are now schooling from home, and I bought several second hand laptops for them to use for school. This helped with the setup a lot.
Lets start of with some goals we want to achieve
- Setup MDT
- Create application installations
- Create driver packages
- Build a basic Windows 10 reference image (with latest Windows updates)
- Build a production Windows 10 image (and choose the apps to install)
- Create offline media (ISO file) which can be used on a USB drive
Some assumptions we are making
- You have 1 or more models of laptops or desktops from the usual vendors (Dell, Lenovo, HP, etc)
- The production deployments will be offline most of the time, using a USB drive
- Your Windows 10 product key is either embedded in the BIOS of your laptop or you can manage that on your own
- You will be fine to semi automate the installation, and do the user setup manually later
- Simple use only. Not “enterprise grade” solution 🙂
What we expect is in the end is a much simpler Windows 10 setup experience across multiple devices.
This is the first part of this series. In this first part, we will focus on getting the necessary items first, before we go ahead and start the installation next
Parts Needed
We will need to get several things before we get started
Tools and Software
- We will need MDT of course, which we can download here
- We will also need the Windows 10 ADK, which we can download here
- We will also need the Windows 10 Media Creation Tool, to get our Windows 10 base installation.
- Media creation tool can be downloaded here.
- If you have used this tool recently and have a fairly recent Windows 10 ISO file, you can skip this step
- We will also need to use virtual machines.
- You can use anything you are comfortable with, Hyper-V, Oracle VirtualBox or VMWare Player.
- For this setup, I will be using VMWare Player, which you can get here
Customizations and Applications
Next we will need to get the software that we will install on the production image. You can use any that you like, but in this example, I will be using the following:
- Chrome
- This normally what most users install anyway
- There are several types of installers, but will get the 64bit standalone (offline) installer for all users
- Get it from here
- Zoom
- You can skip this, but it was necessary for my kids and their online school work
- Get the latest direct download here
- Office 365
- This is needed for my use case, but you can skip this if it is not necessary for you, as this has more steps involved
- We will to use the Office Deployment Toolkit and a configuration XML to install
- Get the ODT here
- We will look into the XML file in a later session
- 7Zip
- Not absolutely necessary, but a useful addition for as I find it easier to work with Zip file with 7Zip
- Get the latest version here
- I will be using the latest x64 installer
- ConEmu
- If you work with the console/cmd/powershell a lot, you might want to consider this tool
- Has tabbed interface and it is to me much nicer than the default Powershell or CMD tools
- Get the latest version here
- Foxit PDF Reader
- I prefer Foxit PDF Reader over Adobe Acrobat Reader so feel free to skip this if necessary
- To get the MSI installer, you need to register an account first and then download the MSI installer files
- Register here to download
I will also use a few helper items and scripts.
- Windows 10 Decrapifier
- This removes some of the unnecessary built in apps on Windows 10. We will also add some custom code to this script later, to customize our Start Menu layout and show file extensions in Explorer
- Get it here
- Font installer script
- There are a few fonts I like to use all the time, so I’ll use a script to add this in to the production build as well
- Get the script here
You can add more applications on your own and remove those you don’t need from this list. Just note, for each application, you need to figure out the installation command line needed to install the application silently with no user interaction.
Windows Updates
We have a few options for Windows Updates
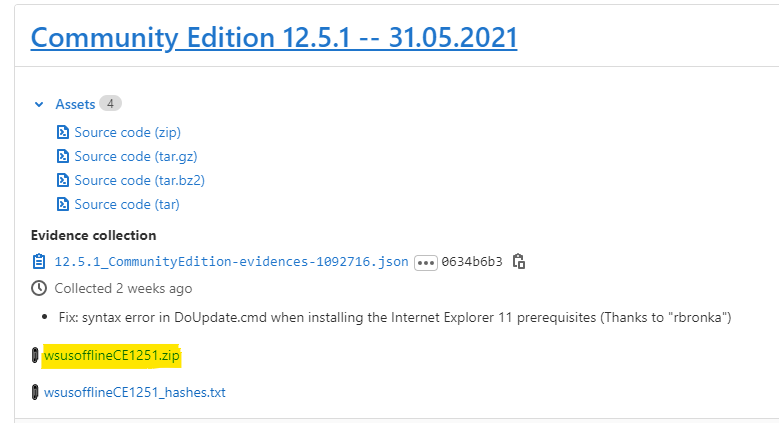
- WSUS Offline
- Handy tool to download all the latest Windows 10 updates, including Windows Defender updates and the C++ runtimes, which can then be installed later offline.
- Works well and saves some time as updates are downloaded offline
- Some updates might be missing and less control over what to install
- Get it here
- Powershell module PSWindowsUpdate
- A lot of control over how updates should be installed
- Easier to setup compared to WSUS Offline
- No pre-downloads and needs internet connection to work
- Get it here
- The download is the nupkg format. You can rename this to .zip and extract.
- The final folder structure should be PSWindowsUpdate\2.2.0.2 (ModuleName\Module Version) with the contents of the zip file in the module version folder.
- Built in MDT method to run Windows Update
- Easiest to setup
- Slower than the other methods
- No control and installs everything, including drivers for your VM
[info]Technically, you can still modify script ZTIWindowsUpdate.wsf script to customize the update settings, but it is not something I would prefer to do.[/info]
Drivers
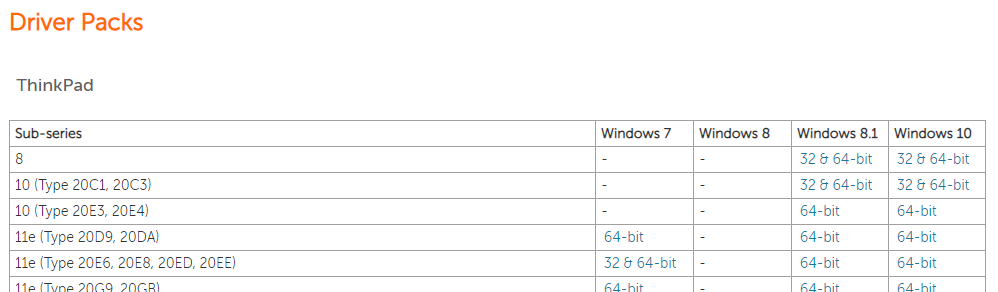
Drivers are easy if you have a laptop or desktop from Dell, Lenovo or HP. I’m not sure about other vendors but the 3 vendors make driver packs available by machine types so it is easy to get all the drivers you need
For Lenovo, you can get the driver packs here. Scroll down to driver packs and find your machine model. Then click the Windows 10 download link
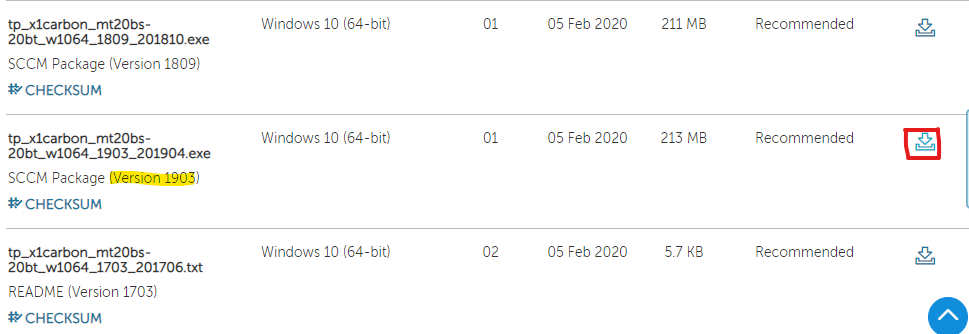
Then in the download page, select the latest version to download
For Dell, is pretty much similar. You can get the driver packs here. Note, the latest drivers are in the first column.
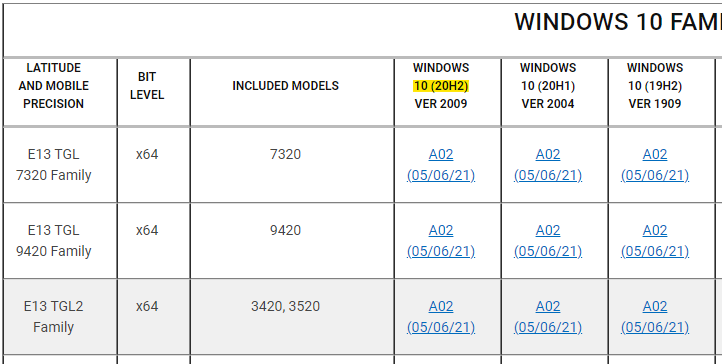
Once you find your machine model, you might not have the latest version of Windows listed, that is fine, just get the latest they have
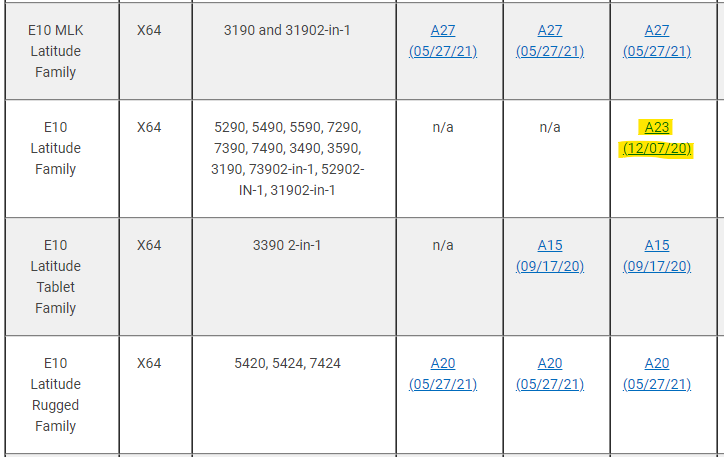
And finally, for HP, it is pretty similar as well. You can get the drivers here.
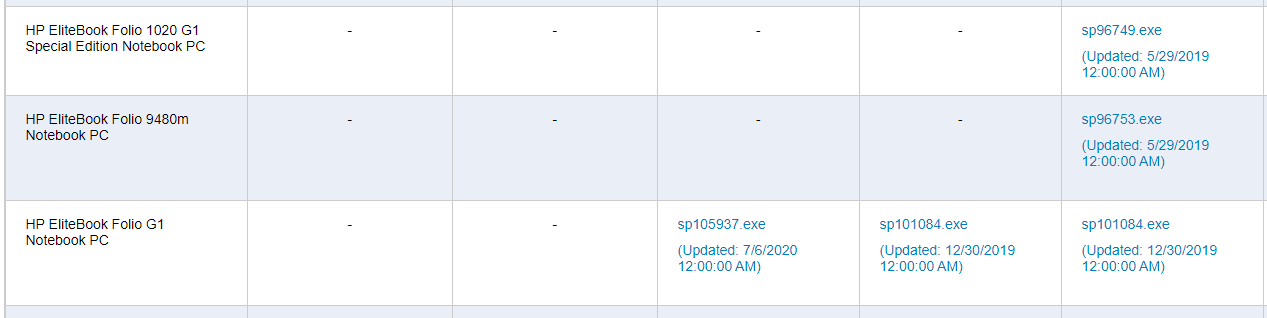
I do not actually have a HP machine or laptop though, so my examples later will focus on the Dell and Lenovo drivers instead.
What if you can’t get driver packs? Well, you will need to get the individual driver files. For example, if you have a custom build pc, and are using a ASUS motherboard, you can get the driver files for your network card, storage devices, USB drivers, and others from ASUS. We can then import these drivers into MDT.
Getting Started
Well, more of some prep work actually. There is a few things you can do to get started.
- Install VMWare Player or any other virtualization tool you prefer
- Create your Windows 10 ISO file
Media Creation
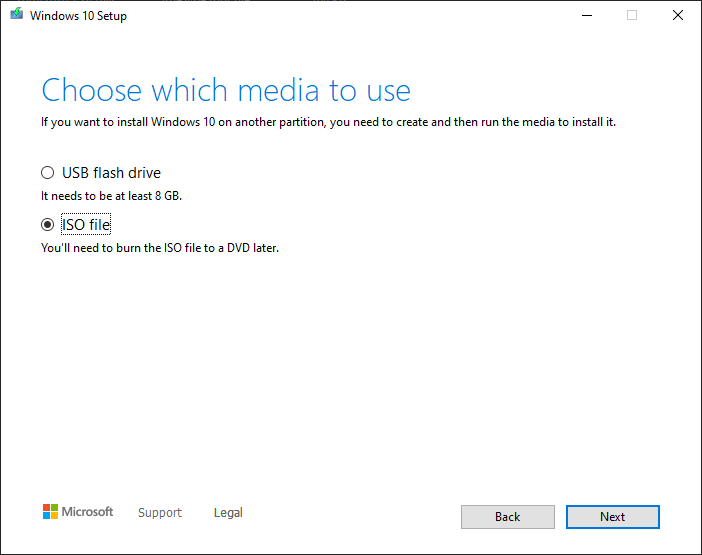
The ISO file is easy to create. Launch the Media Creation Tool and choose to create installation media.
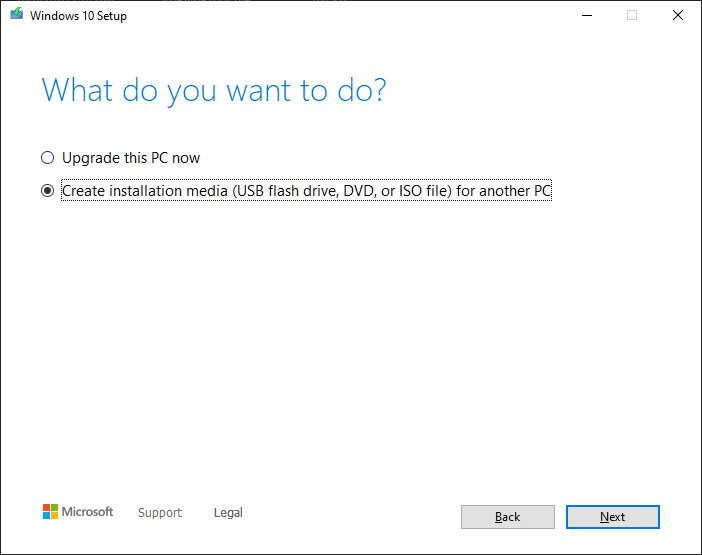
Choose the ISO file option. Once you click next, you need to choose a location to save the ISO file.
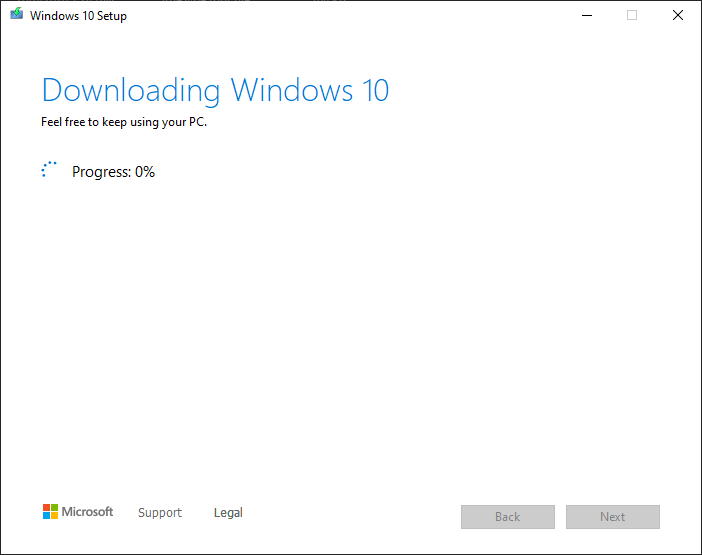
The tool will take a few minutes to create the ISO file
Checking Windows 10 License Information
You may also want to check on your Windows 10 license information as well. You do not need your key for testing, but on your production machines, this will be helpful to know
Ready to Start!
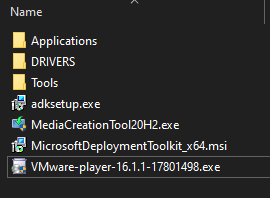
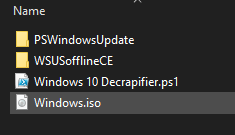
With all the above steps done, you should have all your tools and installers ready to go. I use a folder structure like so:
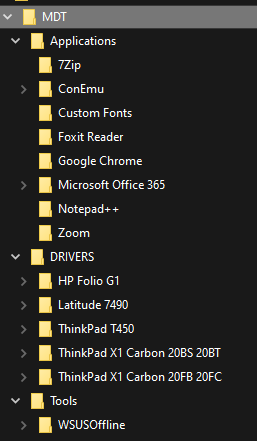
The MDT installers are in the root folder, along with the Media Creation Tool and VMWare Player
You can use any structure you like, as long as you are organized later on.
For the tools, I extracted WSUSOffline to its own folder and renamed the Windows 10 Decrapifier file to Windows 10 Decrapifier.ps1. I also have my Windows 10 ISO file here as well.
Well, that is it for Part 1. In part 2, we will install ADK and MDT and create our deployment share. See you in part 2.