
This is article is part of a 5 part series. Refer to the other parts here
In part 2, we installed everything and got out first task sequence working. Now lets go further and finish off our reference image.
Customs Tasks
We be adding several tasks to our task sequence to complete it.
Add Windows 10 Decrapifier
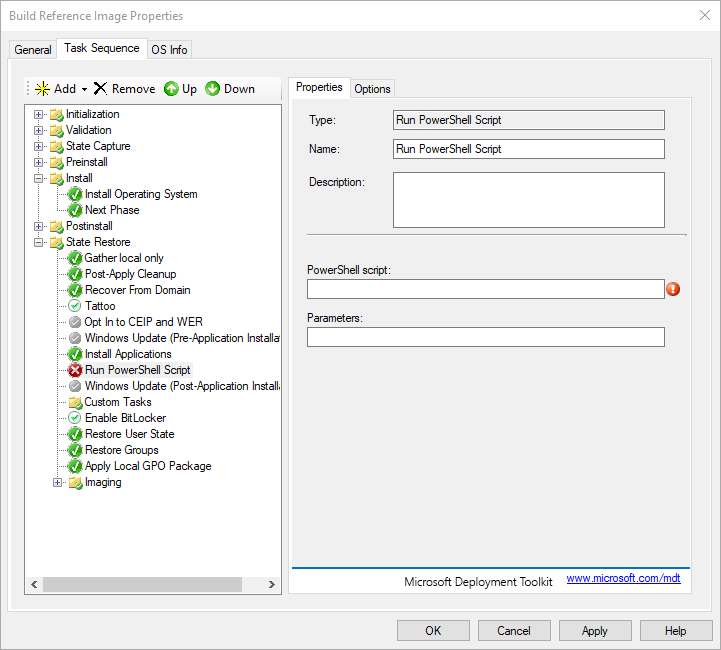
Open the task sequence by double clicking it and click on the Task Sequence tab.
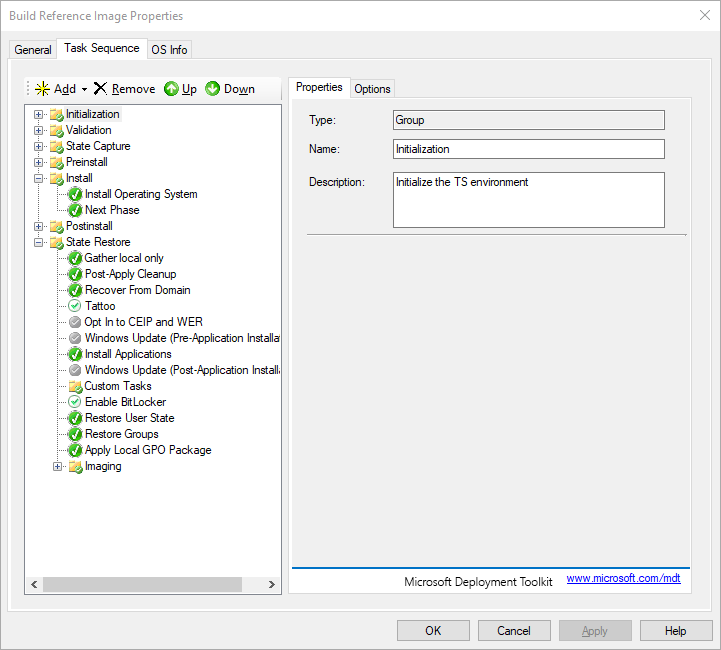
We want to add an action after the Install Applications task step, in the State Restore group. This is because in our script, we have a dependency on Office 365 installing first, since we need to customize the Start Menu layout with Office apps after Office 365 is installed.
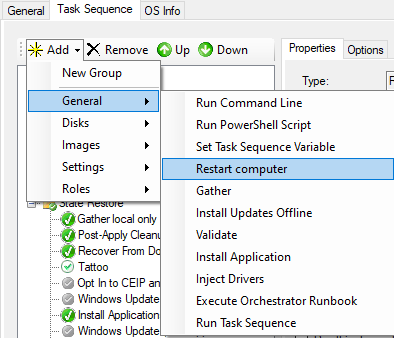
Select Install Applications in the task sequence. Click the Add button at the top, General and select Run Powershell script.

You can move the Powershell script task step up or down, if it is not after Install Applications.
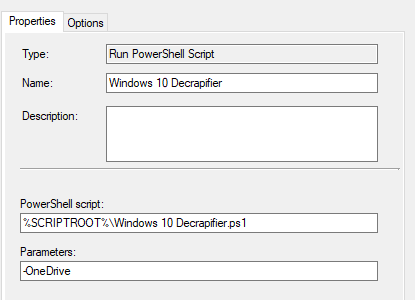
You can choose what options you want for the script. For me, to keep OneDrive, I will use:
'.\Windows 10 Decrapifier.ps1' -OneDriveSo in the task sequence step, for PoweShell script, use:
%SCRIPTROOT%\Windows 10 Decrapifier.ps1For Parameters, use:
-OneDriveSo it looks like:
We also want to allow the task sequence step to continue if there are errors running this script. In the Options tab, check Continue on error.
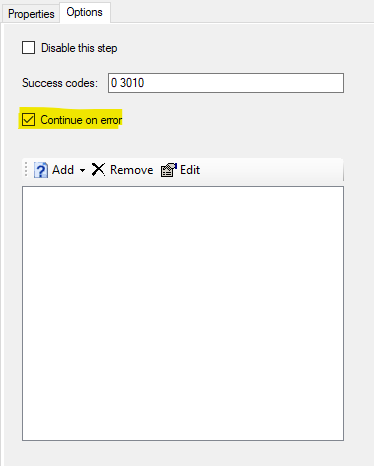
Notice the task sequence step icon color is different from Install Application, where continue on error is not checked, and from the grey icons, for disabled steps.
Windows Updates
You will need to select your method of choice here from 1 of the 3.
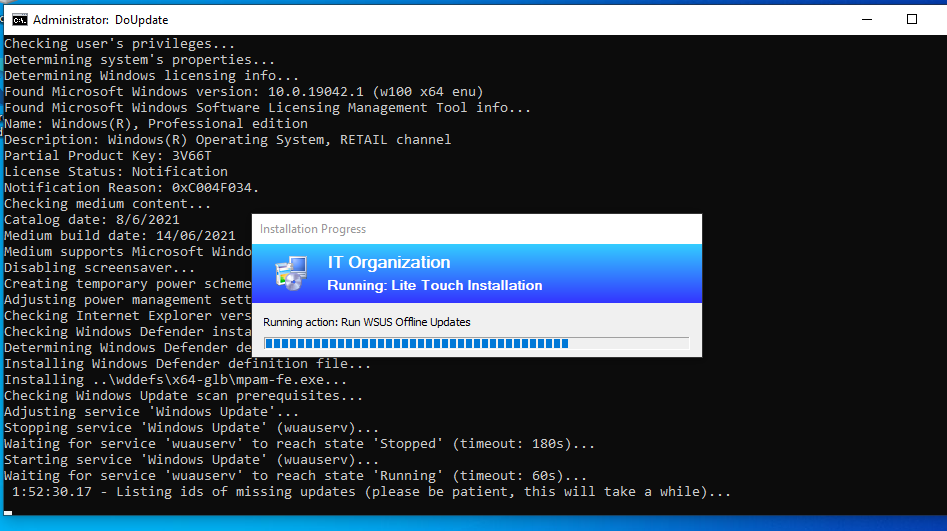
Add WSUS Offline Updates
WSUS Offline updates is a little more tricky to run as we need to make a few changes and create a launcher script.
WSUS Offline Modifications
We need to edit the file C:\DeploymentShare\WSUS\cmd\DoUpdate.cmd. At the end of the file, there is a endlocal line. We make an edit right at the end of this file. We will add an exit command
Before
:EoF
cd ..
echo Ending WSUS Offline Update at %TIME%...
call :Log "Info: Ending WSUS Offline Update"
title %ComSpec%
if "%RECALL_REQUIRED%"=="1" (
  verify other 2>nul
  exit /b 3011
)
if "%REBOOT_REQUIRED%"=="1" exit /b 3010
endlocal
After
:EoF
cd ..
echo Ending WSUS Offline Update at %TIME%...
call :Log "Info: Ending WSUS Offline Update"
title %ComSpec%
if "%RECALL_REQUIRED%"=="1" (
  verify other 2>nul
  exit /b 3011
)
if "%REBOOT_REQUIRED%"=="1" exit /b 3010
endlocal
exit /b 0
WSUS Offline Launcher script
Create a new script in the cmd folder called RunWSUSOfflineUpdates.ps1. The code for this script is just 1 line.
Start-Process -FilePath "Z:\WSUS\cmd\DoUpdate.cmd" -WaitSave this file and we will use this in our task sequence.
WSUS Offline to Task Sequence
Create a folder in the task sequence. Click Add and select New Group, and call it WSUS Offline.
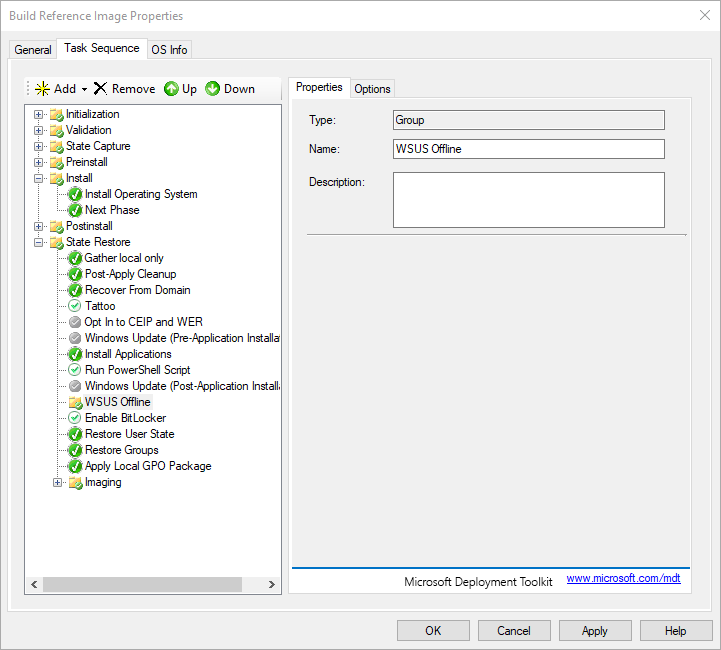
Next we add the Run Powershell script task step to run the WSUS updater.
%SCRIPTROOT%\RunWSUSOfflineUpdates.ps1
We also want to add a reboot after the updates are installed, so click Add > General > Restart Computer.
Final result:
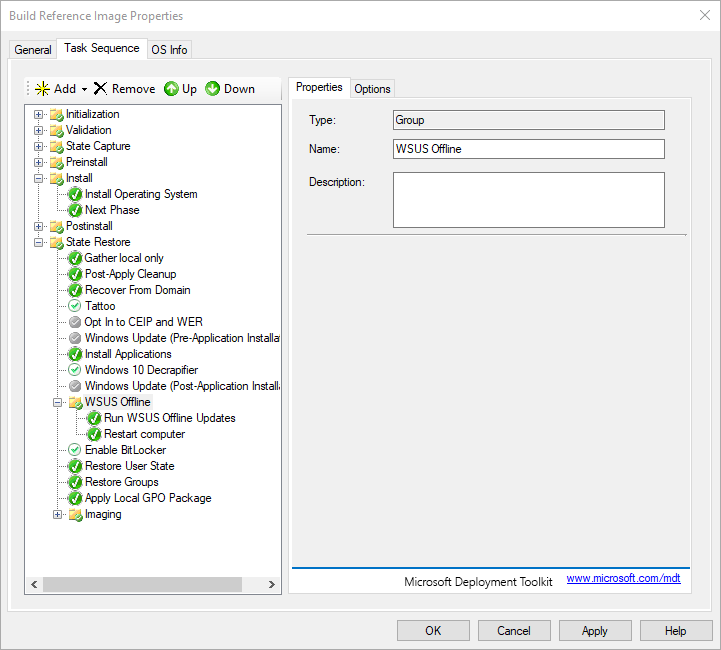
To ensure all updates are installed, you can opt to duplicate the 2 steps again. This will mean we run WSUS Offline > Restart > WSUS Offline > Restart
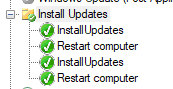
PSWindowsUpdate Powershell Module
Create a folder in the task sequence. Click Add and select New Group, and call it Install Updates.
Create a script file called RunPSWindowsUpdates.ps1 in C:\DeploymentShare\Scripts. The script file contents:
Import-Module -Name "Z:\Scripts\PSWindowsUpdate" -Verbose
Get-WindowsUpdate -NotCategory 'Drivers' -Install -IgnoreReboot -AcceptAll
Then we add a Powershell task sequence step to call this script.

We also add a restart step after this. We also duplicate the steps so we can install as many updates as possible.
Click OK to save and close the task sequence. And then update the deployment share.
Use built in MDT Update Step
The update step already exists in the task sequence, but it is just disabled. We need to enable it.
Select the step and untick Disable this step.
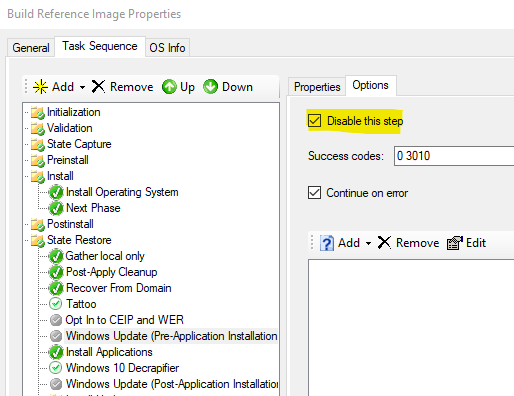
There is a pre-application install and post application install step. Typically you would want to get updates after all your application have been installed.
Testing Our Task Sequence
Click OK to close and update the deployment share.
We now want to test it again. Boot the reference VM again from the MDT LiteTouch ISO file and lets try it again. If you are using VMWare, ensure your ISO file is still connected and when you are starting up the VM, press F12 to show the boot menu and select the DVD drive.
Everything should work just fine:
The task sequence should run till the end without issues. You might see the new start menu layout, but it will be set for any new users who login.
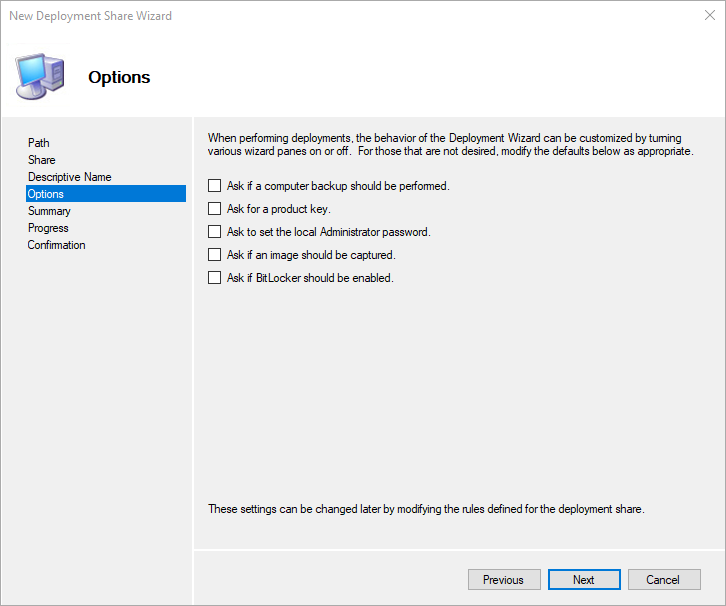
Simpler Steps
Every time we launch our task sequence, we need to key in a lot of details to get started. Deployment share credentials, time zone, locale…all which we can choose some defaults so we don’t need to keep keying it in.
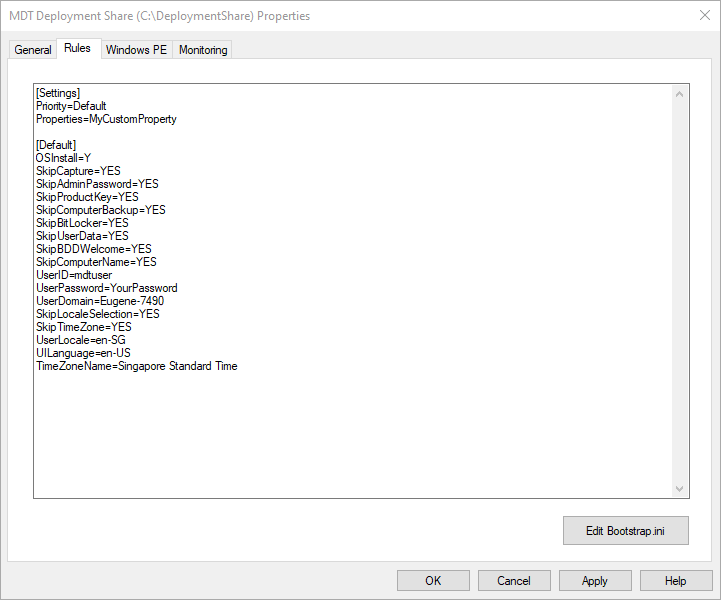
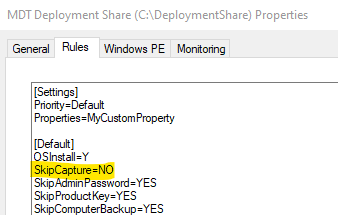
These settings are controlled in the file CustomSettings.ini in the folder C:\DeploymentShare\Control. Right now, it looks like this:
[Settings]
Priority=Default
Properties=MyCustomProperty

[Default]
OSInstall=Y
SkipCapture=YES
SkipAdminPassword=YES
SkipProductKey=YES
SkipComputerBackup=YES
SkipBitLocker=YES
We want to add a few more settings to we have less to key in later. So, we add the following:
SkipUserData=YES
SkipBDDWelcome=YES
UserID=mdtuser
UserPassword=YourPassword
UserDomain=Eugene-7490
SkipLocaleSelection=YES
SkipTimeZone=YES
UserLocale=en-SG
UILanguage=en-US
TimeZoneName=Singapore Standard Time
What does each one mean?
- SkipUserData = Skips option to restore user data
- SkipBDDWelcome = Skips the first welcome screen
- UserID= User credentials to access the deployment share
- UserPassword = User credentials to access the deployment share
- UserDomain = Host machine name
- SkipLocaleSelection = Do not prompt to select locale
- SkipTimeZone = Do not prompt to select timezone
- UserLocale = Locale to set
- UILanguage = Language to set
- TimeZoneName = Timezone name
You can check the name of your timezone using tzutil.exe. To show your current timezone:
tzutil /gTo list all available timezones:
tzutil /lWe should also make similar change to bootstrap.ini in C:\DeploymentShare\Control.
Bootstrap.ini before:
[Settings]
Priority=Default

[Default]
DeployRoot=\\EUGENE-7490\DeploymentShare$
Bootstrap.ini after
[Settings]
Priority=Default

[Default]
DeployRoot=\\EUGENE-7490\DeploymentShare$
UserID=mdtuser
UserPassword=YourPassword
UserDomain=eugene-7490
SkipBDDWelcome=YES
Save your changes and then update the deployment share.
You can also access this setting directly from MDT. Right click the deployment share and choose Properties. Click on the Rules tab.
You can also access Bootstrap.ini this way. Personally, I like using Notepad++ to edit these files, as Notepad++ has syntax highlighting.
We now want to test it again. Boot the reference VM again from the MDT LiteTouch ISO file and lets try it again. If you are using VMWare, ensure your ISO file is still connected and when you are starting up the VM, press F12 to show the boot menu and select the DVD drive.
Once the task sequence starts, you will notice there is no more Welcome screen and you just need to select the task sequence to continue. Also there is a lot less steps. We also did not need to key in any usernames or passwords. Just computer details and select the applications to install.
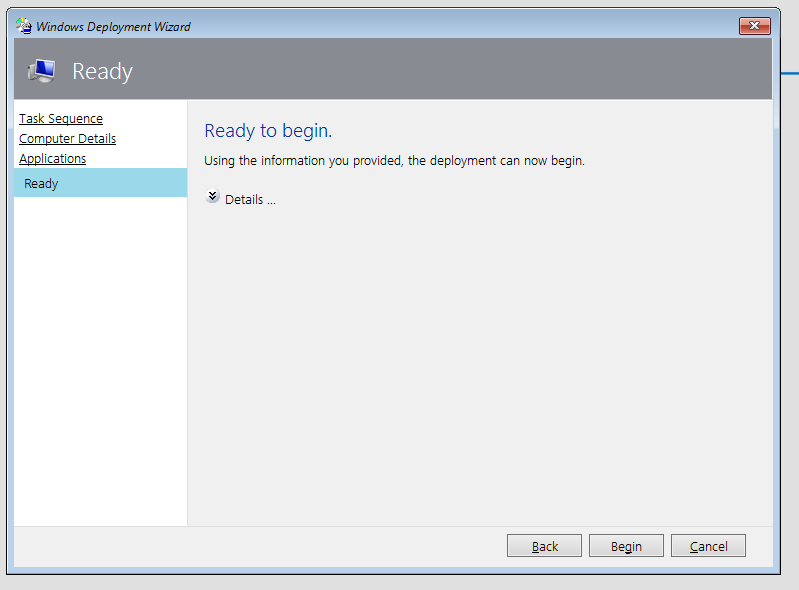
We can go even further as well, but it is simple enough to just click next a few times before everything starts. You can go ahead if you like, or you can cancel and shutdown the VM for now.
If you would like to skip more steps you can check out the reference here.
Capture a Reference Image
Now that our build process is working as we expect, we can go ahead to capture this image. When we first setup MDT, we unchecked the option to ask to capture.
Now we need to enable this. The option is in the CustomSettings.ini file. We need to change SkipCapture=YES to SkipCapture=NO.
Save the file and update the deployment share. Now we can start the task sequence on the VM again, let everything run and capture a reference image for use to use in the next part.
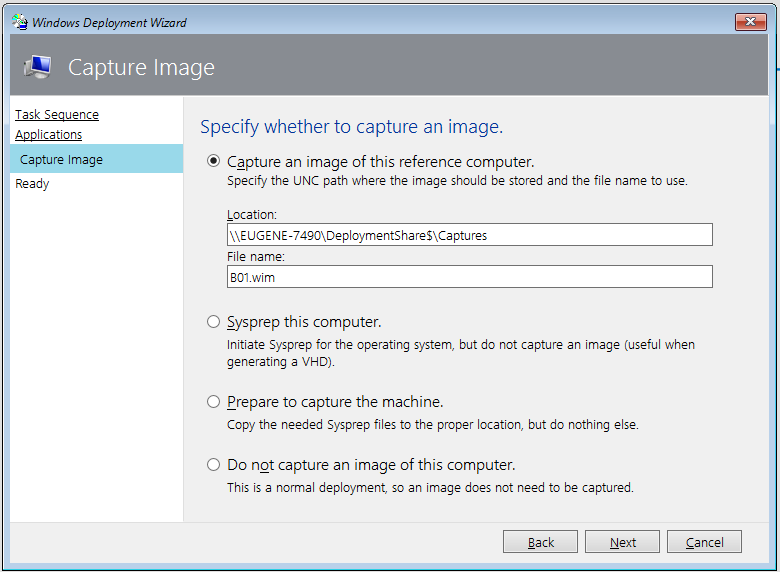
When you start the task sequence now, we have a new step for capturing the image. Select the first option and click Next and let the task sequence finish, including the capture step.
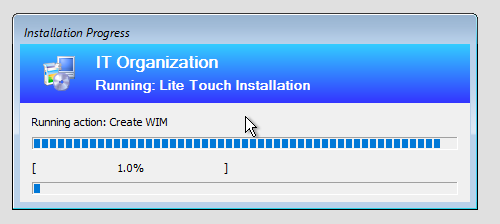
At the end of the build, MDT runs sysprep before the image is captured.
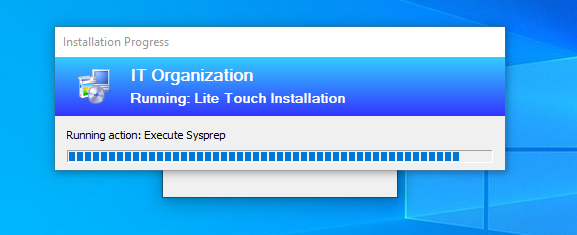
Then a reboot and the capture starts
After the capture is done, there is a warning related to Office, which can be ignored.

After the build is done, MDT will then capture the image and save it to the deployment share Captures folder.

So that a major part done!
Some things to consider:
- If you do not plan to update a reference image on a regular basis, you can actually manually set things up, including installing of Office 365, other apps, getting Windows Updates directly from Windows. You can then add a capture only task sequence later to just capture the image.
- The more items you set, install or configure here, the longer it would take to complete for the reference image, but it will be faster later when setting up the production image.
So that is all for part 3. We will continue with drivers and the production task sequence in the next part.
See you in part 4.